
How to Cut Mens Hair at Home
The modern man often finds himself asking a simple question: why pay a barber thirty to fifty dollars every few weeks when the basics of hair cutting can be learned and executed at home? For decades, professional haircuts have been considered the domain of trained stylists and barbers, yet the reality is that trimming men’s hair at home is entirely achievable with the right approach, tools, and mindset. The pandemic accelerated this trend considerably, forcing millions of men to take scissors and clippers into their own hands out of necessity. What began as emergency measures became permanent habits for many, and for good reason. Not only do you save considerable money over time, but you also gain complete control over your appearance and the freedom to maintain your look on your own schedule.
The prospect of cutting your own hair might seem intimidating at first. The fear of making mistakes, creating uneven lines, or ending up with a lopsided result keeps many people in the chair rather than taking the plunge themselves. However, this guide will walk you through every step of the process in clear, manageable terms. By the end, you will understand exactly what tools you need, how to use them properly, and how to execute clean, professional-looking cuts right from your bathroom or bedroom. The confidence you build from your first successful cut will make subsequent trims easier and more enjoyable.
Essential Tools and Equipment You Will Need
1 The Foundation of Quality Tools

Before you make your first cut, you must invest in the right equipment. This is not a place to economize. Attempting to cut hair with kitchen scissors or dull household tools will result in frustration and poor results. Professional-grade cutting tools are designed specifically to handle hair texture and maintain sharpness through repeated use. The difference between trying to cut with kitchen scissors and proper hair scissors is night and day. Your hair will fray and break rather than cut cleanly, making the entire process more difficult and the final result less polished.
Begin with a quality pair of hair clippers. Hair clippers are the workhorse of home haircuts and should be your primary investment. Look for models with multiple guard attachments that allow you to adjust the cutting length. The guards are numbered typically from zero to eight, with zero being the closest to the scalp and eight allowing more length. A basic set will include several guards, which gives you flexibility in creating different styles and layering effects. Wireless clippers with rechargeable batteries offer convenience, while corded models often provide more consistent power. Choose one that feels comfortable in your hand and has reviews specifically praising its versatility for home use.
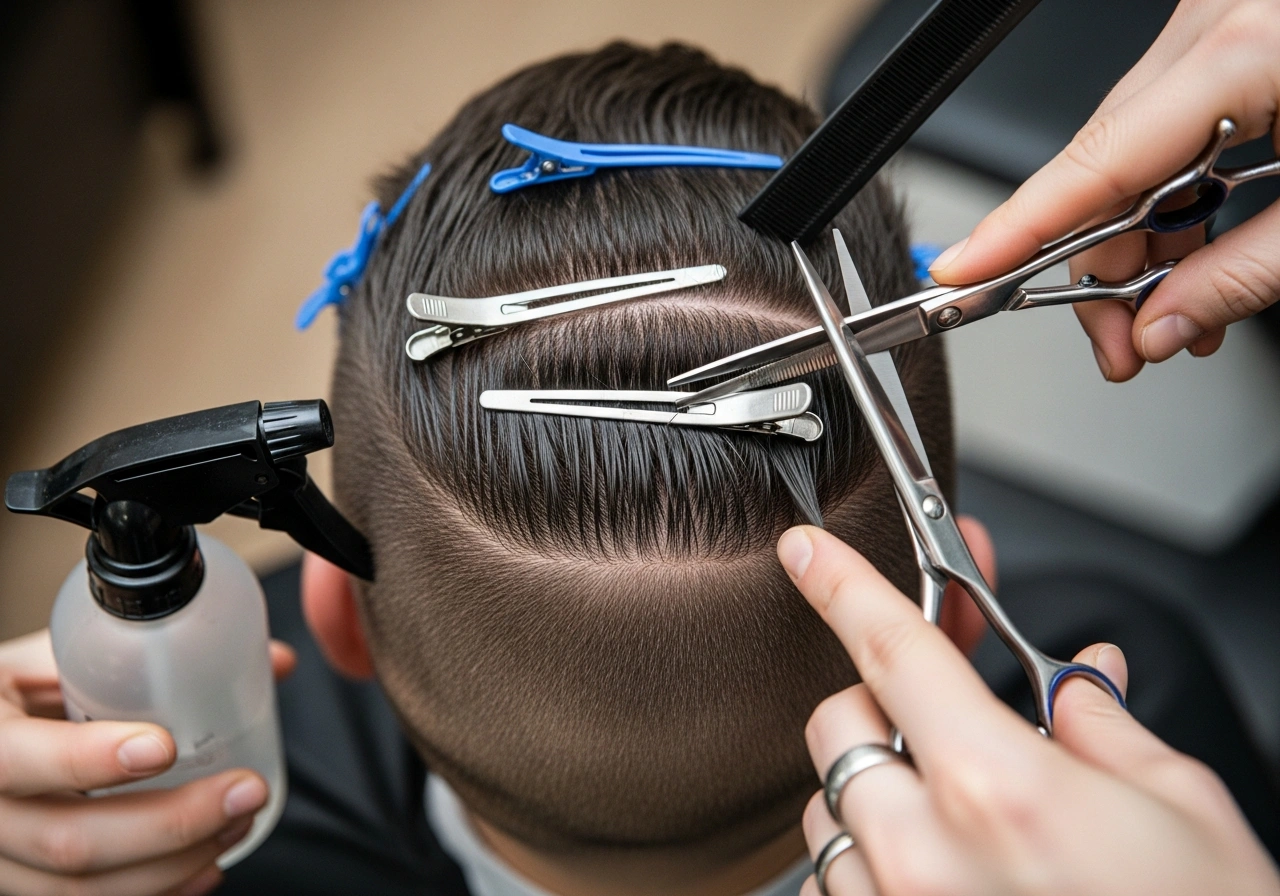
Professional hair scissors, also called shears, are your secondary essential tool. These are much smaller and more precise than kitchen scissors, typically five to six inches in length. The blades are specially sharpened and angled to cut hair cleanly rather than crushing it. Thinning shears or blending shears are also valuable additions to your toolkit, as they help remove weight from sections of hair and create smoother transitions between different lengths. They look like regular scissors but have teeth on one blade, which allows them to thin hair gradually rather than cutting bluntly across.
Additional tools complete your setup. A fine-tooth comb helps you direct hair and hold it in place while cutting. A sectioning comb with a tail attachment allows you to divide your hair into manageable portions. Hair clips keep sections separated and organized. A handheld mirror, combined with a larger wall mirror, gives you visibility of all angles, particularly the back of your head where you cannot see directly. A spray bottle filled with water helps you dampen hair slightly for easier cutting and better control. Finally, a neck duster brush removes small loose hairs from your face and neck after cutting.
you may also like this:17 Best Mens Haircuts Short Hair Indian
Preparing Your Hair Correctly Before You Cut
2 The Critical Preparation Phase
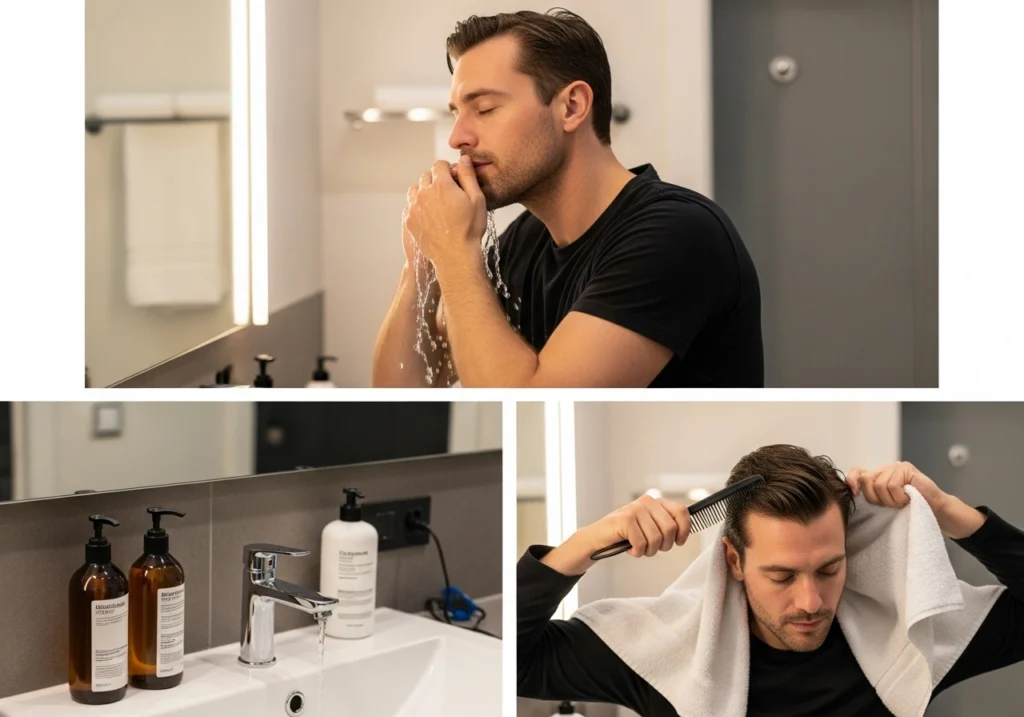
How you prepare your hair directly impacts the success of your cut. Many people rush through this step, but doing so causes problems later in the process. Start by washing your hair thoroughly with shampoo and conditioner. This removes product buildup, dirt, and oils that can cause hair to stick together or behave unpredictably during cutting. Once washed, dry your hair completely with a towel or blow dryer. Wet hair and dry hair look different when they are cut. Wet hair is heavier and appears longer, so cutting wet hair often results in a significantly shorter final result once the hair dries and returns to its natural state.
After drying, comb your hair thoroughly to remove any tangles or knots. Use your fingers or a brush to separate any matted sections. Take a moment to observe how your hair naturally falls and parts. Most people have a natural hair part or direction that their hair prefers to grow. Work with this natural tendency rather than against it. Once your hair is clean, dry, and detangled, you are ready to begin the cutting process. This preparation phase might seem tedious, but it makes the actual cutting significantly easier and results in more accurate, even cuts.
Understanding Clipper Guards and Their Numbers
3 Decoding Guard Numbers for Correct Lengths
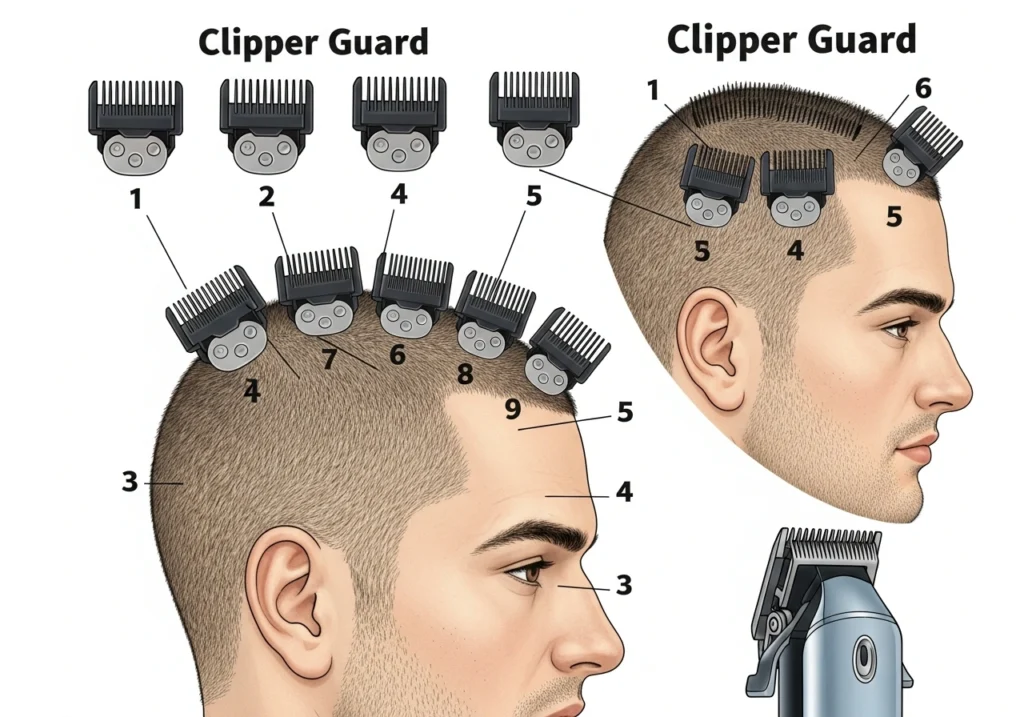
The numbered system for clipper guards confuses many beginners. Understanding this system is essential to achieving your desired length. The number corresponds to how much hair remains on your head after cutting. A number one guard, for example, leaves approximately one eighth inch of hair, while a number four guard leaves approximately half an inch. Lower numbers create shorter cuts closer to the scalp, while higher numbers preserve more length. When starting out, err on the side of longer guards. You can always cut shorter if you are unsatisfied, but you cannot add hair back once it is cut.
Most haircuts involve using multiple guards in succession. You might start with a number two guard on the sides and back, then blend upward using a number three, then a number four for the upper sides. This gradual transition creates a fade or taper, which is the hallmark of well-executed men’s haircuts. The transition between different guard lengths should appear seamless rather than showing obvious lines. This blending is where the real skill in home hair cutting develops. Do not expect perfect fading on your first attempt. Practice, patience, and careful observation of your work in the mirror will improve your technique over time.
The Fundamental Process of Cutting Sides and Back
4 Starting With the Foundation

Begin your cut on the sides and back of the head, as these areas are most forgiving for beginners. The sides and back do not have the complexity of the top, and mistakes here are less visible than errors in the front. Start with your chosen guard attached to the clippers. If you want a basic short cut, a number two guard is a standard choice. Position your clippers at the bottom of the sideburn area and move upward in smooth, even strokes. The motion should be steady and deliberate. Do not jab or poke with the clippers. Let them do the work as you guide them upward.
Work your way around one side of the head methodically. Keep checking that you are maintaining an even length. Switch to the other side and repeat. Once both sides are trimmed to your desired length, move to the back. The back of the head is trickier because you cannot see it directly without using mirrors. Use your handheld mirror in conjunction with your wall mirror to see the back clearly. Some people find it helpful to work in sections, trimming a small horizontal section and then checking their work in the mirror before moving to the next section. This slower approach prevents the regrettable mistake of cutting too much off before you realize your error.
Trimming and Shaping the Top of Your Head
5 The Most Detailed Section

The top of your head is where your hairstyle actually takes shape. This is the most challenging part of a home haircut because it requires more precision and control than the sides and back. If you want to maintain significant length on top, you will be using scissors rather than clippers. If you prefer a very short all-over cut, clippers with a longer guard will suffice. For a more textured look with some length on top, begin by dampening the top section slightly with your spray bottle. Comb the hair upward in the direction it naturally grows.
Take a small section between your fingers at the front of your head. This section will serve as your guide. Cut this section to your desired length with your hair scissors. Everything else on top will be cut to match this initial guide section. Proceed section by section, moving backward across the top of your head. As you move to each new section, comb it up and include a small portion of the previously cut section in your new cutting area. This ensures that all sections blend together smoothly and maintains an even length across the top. Many people underestimate how long this part takes. Being patient and working methodically will yield far better results than rushing.
Creating Seamless Blends and Achieving a Polished Fade
6 The Art of Blending Techniques
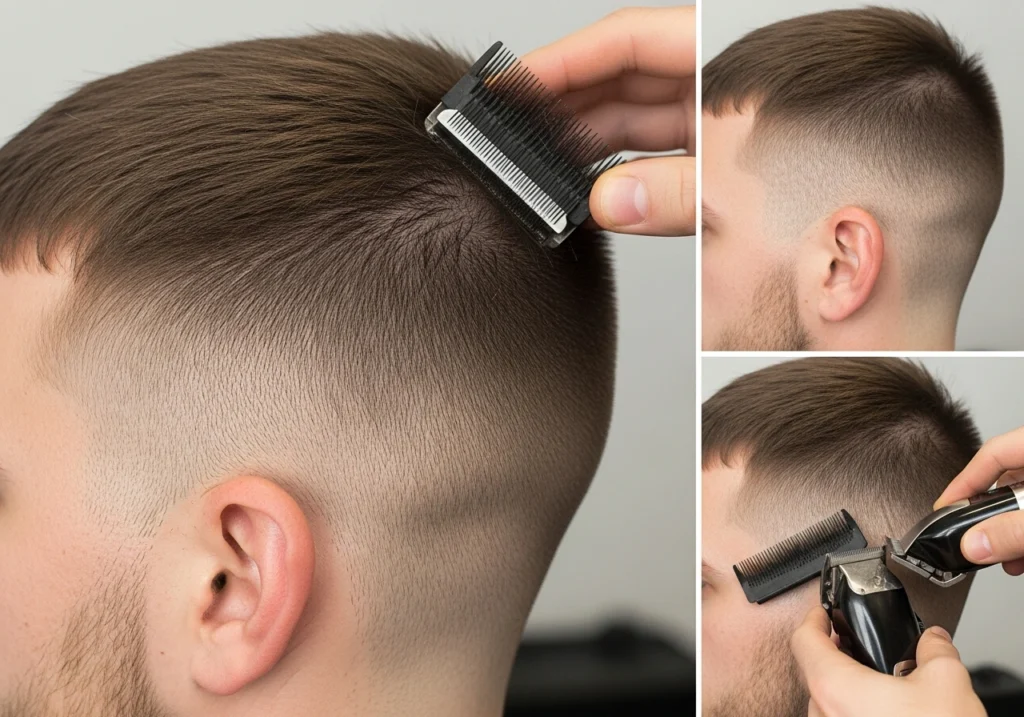
Blending is what separates an amateur haircut from one that looks professionally executed. The blend is the transition zone between the shorter sides and back and the longer hair on top. To create this blend, you use progressively longer clipper guards as you move up the sides of the head. If you started with a number two guard at the bottom, you might use a number three in the middle area and a number four higher up. The key is to overlap these guard changes slightly so that no obvious lines are visible.
Use small, controlled motions as you move the clippers through the blending area. Some barbers employ a rocking motion, angling the clippers slightly as they move to create an even more seamless transition. Do not rush this part of the process. Check frequently with your mirror, especially around the temple area and around the ears where visibility is tricky. The ears require special attention. You want to trim around them carefully without cutting into the hairline. Pull the skin taut as you cut near the ears to avoid accidentally nicking yourself. Take your time and work deliberately in this area.
Common Mistakes to Avoid During Your Haircut
7 Learning From the Errors Others Have Made
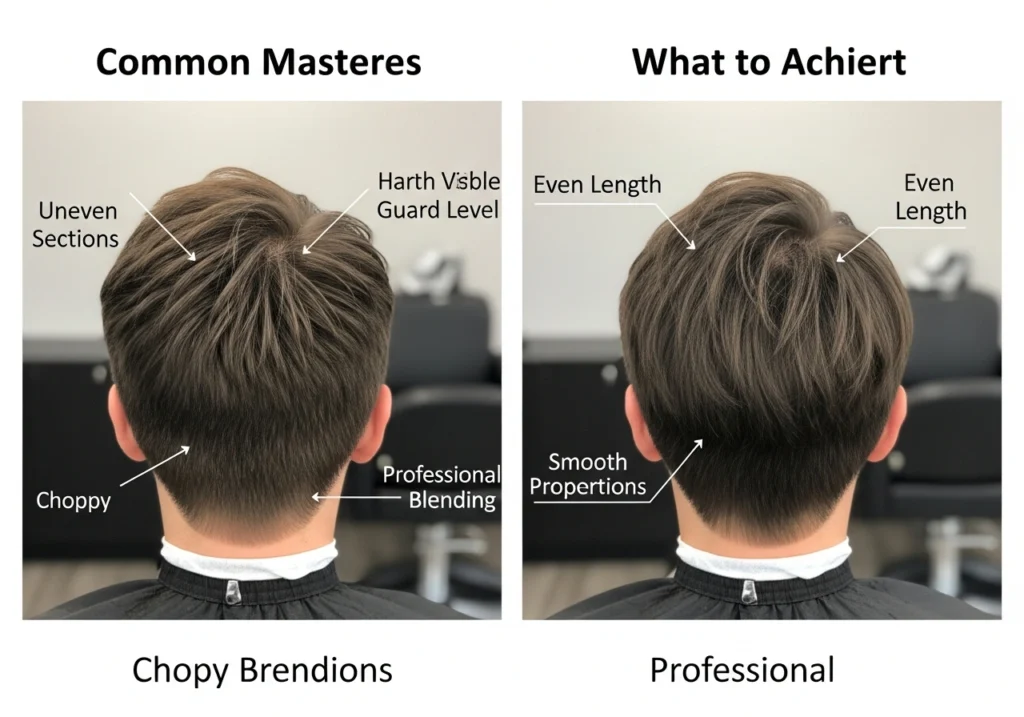
The most frequent mistake beginners make is being too aggressive with their cuts. Excitement, nervousness, or overconfidence leads people to remove far too much hair in their first pass. Once hair is cut, it is gone. You cannot put it back. A better approach is to cut conservatively, check your work frequently in the mirror, and then remove a bit more if needed. This methodical process takes longer but results in far fewer regrettable decisions and disappointed faces in the mirror.
A second common error is cutting hair that is not properly prepared. Dirty hair, tangled hair, or incompletely dried hair behaves unpredictably and causes uneven cutting. You might think you are creating an even line, but the hair is actually twisted or stuck together, resulting in apparent unevenness once it is dried properly. Always invest the time upfront to wash, dry, and thoroughly brush your hair before cutting.
Many beginners also rush through the blending process or skip it entirely. While a fade takes more time than a simple one-length cut, the time investment is worthwhile. Without proper blending, your haircut looks choppy and amateurish. This blending is where practice makes perfect. Your first fade might not be flawless, but each subsequent cut will show improvement as you understand the technique better.
Maintenance Schedule and Keeping Your Haircut Fresh
8 The Path to Sustained Results
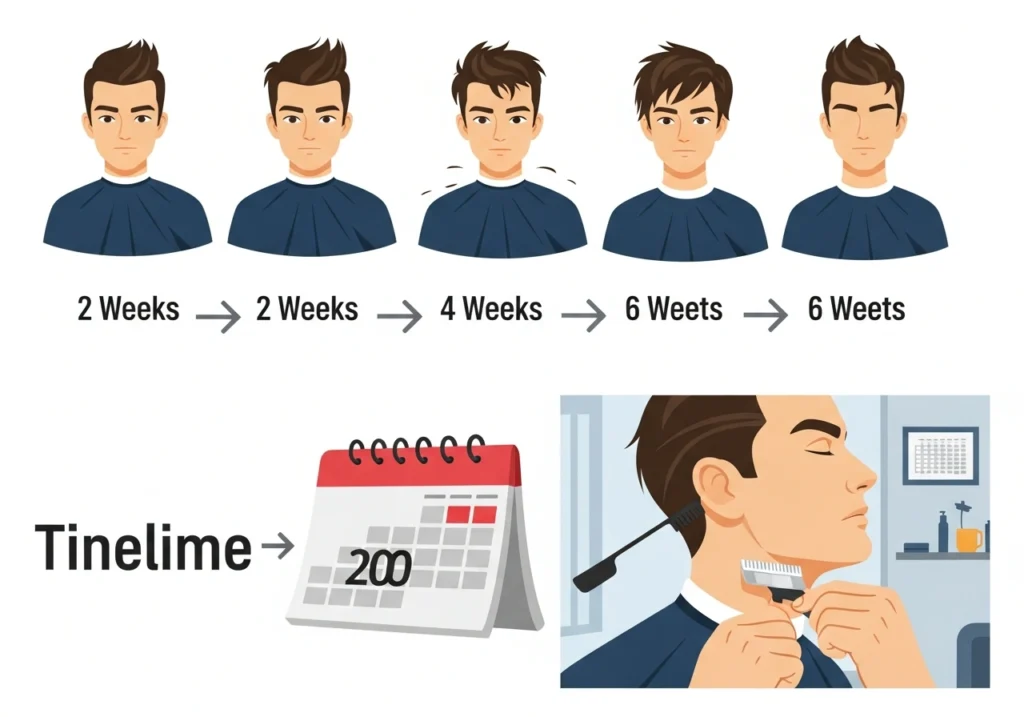
A good haircut does not last forever. Hair grows approximately half an inch per month. Most men benefit from a trim every three to five weeks to maintain their style. Short styles with fades benefit from more frequent touchups than longer, less stylized cuts. If you wait too long between cuts, your fade blends together and your lines become less sharp. The advantage of cutting your own hair is that you can touch up more frequently without the cost and scheduling hassles of barbershop visits.
Between full cuts, you can do light maintenance work. Trim around the neckline and ears with your trimmer to keep things looking neat. This quick five-minute touchup takes almost no time but keeps your overall appearance polished. Many people find that they develop the skill and confidence for a complete haircut after a few months of doing these smaller maintenance tasks. The repetition teaches you how the clippers feel, how the hair responds, and where your comfort zone lies.
Troubleshooting When Things Go Wrong
9 Practical Advice for Recovery and Learning

Despite your best efforts, you will occasionally make mistakes. Perhaps you cut a section shorter than intended, or the blend is not as smooth as you hoped. The good news is that most mistakes are recoverable. If one section is noticeably shorter, you can trim the rest of your hair to match it, effectively making the cut even shorter than planned. If the blend is uneven, you can blend more extensively, evening out the transition. Some mistakes simply need to be accepted. If you create a small uneven spot, a very short term solution is to style your hair in a way that minimizes visibility. A longer term solution is simply to let your hair grow out and try again in a few weeks.
The key mindset is to view each haircut as a learning experience rather than a performance that must be flawless. Professional barbers cut hair every day. They have years of practice and thousands of haircuts under their belt. Expecting perfection on your first or second attempt is unrealistic. Expect gradual improvement. Each cut will go a bit faster and yield slightly better results. By your fifth or sixth cut, you will likely find yourself satisfied with the results and wondering why you ever spent money at a salon.
Different Haircut Styles You Can Execute at Home
10 Popular Options for Various Preferences
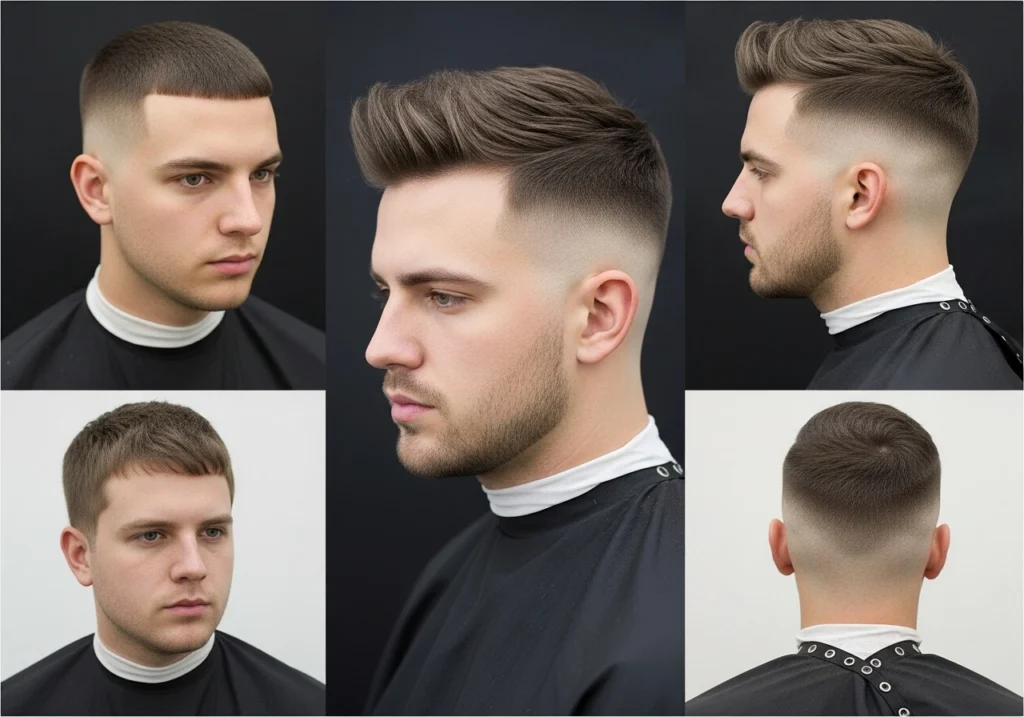
The buzz cut is the simplest style to execute. It requires one clipper guard applied uniformly across the entire head. Start at the bottom of the sides and move upward in even strokes. Work your way around the entire head, then do the top, always using the same guard. The result is uniform length everywhere. This style requires no blending skills and is perfect for absolute beginners. The buzz cut also requires the least maintenance, though it is a very short, bold look that is not for everyone.
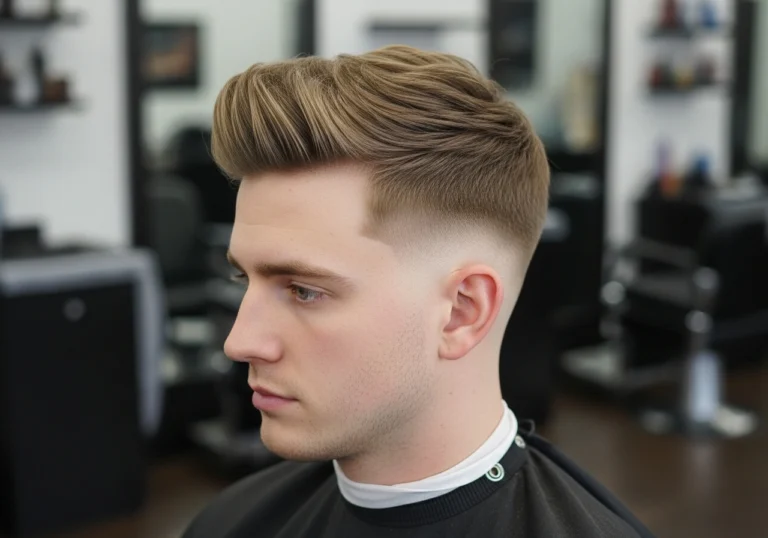
The fade haircut is the most popular style today. It features short sides and back, blending upward to longer hair on top. The top can be styled in various ways depending on preference and hair texture. Creating a fade requires multiple guards and blending skills but results in a professional, contemporary look that works for almost any setting. The low fade is more conservative and appropriate for professional environments, while high fades are more dramatic and fashion-forward.
The crew cut is another timeless option. It is similar to a buzz cut but leaves slightly more length on top, usually around an inch. The sides and back are cut very short, creating a distinct silhouette. The crew cut has returned to popularity in recent years and works well for men with thicker hair or particular face shapes.
Conclusion
Learning to cut men’s hair at home is an achievable skill that offers practical benefits and a sense of accomplishment. The process requires the right tools, proper preparation, patience, and a willingness to learn from your mistakes. Your first haircut will teach you more than any written guide can convey. The physical feel of the clippers, how your specific hair texture responds to cutting, and the relationship between clipper guards and final length become intuitive knowledge only through experience.
The monetary savings alone justify learning this skill. A single barber haircut costs thirty to fifty dollars, and many men visit every month. Over a year, that totals three hundred to six hundred dollars. Investing one hundred and fifty dollars in quality clippers and scissors pays for itself in just three or four haircuts. Beyond the financial aspect, you gain freedom and control. You can trim your hair whenever you want without scheduling conflicts. You can experiment with different lengths and styles without worrying about professional judgment. You become self-sufficient in a grooming task that most men have traditionally outsourced.
Start simply with a basic cut using fewer guards if you are new to this. Work methodically through the process without rushing. Check your progress constantly in the mirror. Accept that your first few cuts might not be perfect, and view the learning process as part of the journey. With each haircut, your skills will improve, your confidence will grow, and the process will become faster and more enjoyable. What seemed intimidating at first will become routine. Soon you will find yourself confidently recommending this skill to friends and wondering how you ever justified paying someone else to do something you can do yourself in the comfort of your own home.
FREQUENTLY ASKED QUESTIONS
Question 1: Can I cut my own hair if I have curly hair?
Answer: Yes, curly hair can be cut at home, though it requires slightly different techniques than straight hair. The key is to cut curly hair when it is dry or only slightly damp, as curly hair shrinks significantly when it dries. You will see a dramatic difference between the length when wet versus dry. Use the same clipper and scissor techniques, but be prepared for a more textured appearance. Curly hair often looks shorter than the actual cut length suggests. Many people with curly hair prefer to keep their cuts shorter overall to avoid excessive bulk and weight.
Question 2: How often should I sharpen or replace my cutting tools?
Answer: Professional hair scissors should be sharpened professionally once or twice per year, depending on frequency of use. Attempting to sharpen them yourself often damages the delicate angle and edge. Clipper blades usually last much longer and become dull gradually rather than all at once. When you notice the clippers not cutting as efficiently, pulling hair, or requiring more pressure, it is time to replace the blades. Most quality clipper sets have replacement blade options available. With proper care and cleaning, a good set of clippers will last years.
Question 3: What should I do if I accidentally cut myself?
Answer: Small nicks happen occasionally. Clean the area with soap and water, then apply pressure with a clean cloth to stop the bleeding. Once bleeding stops, apply antibiotic ointment and a bandage if needed. Most small cuts from clipper accidents are superficial and heal within a day or two. To prevent cutting yourself, always work deliberately and carefully around the ears. Keep your skin taut as you cut near sensitive areas. Never rush or use the clippers in a frantic manner.
Question 4: Is it possible to give someone else a haircut at home, or should I only cut my own?
Answer: Many people successfully cut their spouse or children’s hair at home. The advantage of having someone else cut your hair is that they can see the back clearly without using mirrors, and they can access angles you cannot reach on yourself. The disadvantage is that communication becomes important. Make sure the person cutting your hair understands exactly what length and style you want. Show them photos. Agree on expectations beforehand. Cutting someone else’s hair involves the same techniques and tools as cutting your own, just with different positioning and angles.
Question 5: What is the difference between a fade and a taper?
Answer: A fade is an abrupt or very gradual transition from very short hair to longer hair. Most modern fades blend all the way down to the skin at the bottom, creating a dramatic, sharp look. A taper is more subtle and gradual. It reduces hair length around the sides and back progressively but does not cut down to the skin. A tapered cut is more conservative and often preferred in professional settings. Both can be executed at home with the same clipper and blending techniques. The difference is primarily in how many guards you use and how far up the head you blend.


One Comment