
How to Dye Mens Hair at Home
Dyeing your hair at home has become an increasingly popular grooming choice for men. Whether you want to cover emerging gray strands, refresh your natural color, or completely transform your appearance, learning to dye your own hair offers convenience, cost savings, and creative control. This comprehensive guide walks you through every aspect of the home hair dyeing process, from selecting the perfect shade to maintaining vibrant, healthy-looking color.
Understanding Your Hair Dye Options

Before purchasing your first box of hair dye, understanding the different types available helps you make an informed decision that aligns with your goals and lifestyle.
Temporary hair color represents the most commitment-free option. These products wash out after your next shampoo, making them perfect for special events or testing a dramatic color before committing. While temporary dyes offer minimal risk, they also provide the shortest-lasting results.
Semi-permanent hair dye lasts longer than temporary options, typically surviving 12 to 24 washes depending on the product and your hair porosity. These dyes work by depositing color onto the hair shaft without penetrating deeply or lifting your natural pigment. Semi-permanent options work well for men who want to experiment with color or subtly blend gray hairs without permanent commitment. The gradual fading process means you won’t have harsh demarcation lines as your hair grows.
Demi-permanent color falls between semi-permanent and permanent options. Using a low-volume developer, demi-permanent dyes last approximately 24 to 30 shampoos. They offer better gray coverage than semi-permanent products while still fading gradually over time.
Permanent hair dye creates the most dramatic and longest-lasting change. These products use a chemical process to open your hair cuticle, remove some natural pigment, and deposit new color molecules deep within the hair shaft. Permanent color won’t wash out, though it will fade somewhat over time. As your hair grows, you’ll notice root growth in your natural color, requiring touch-up applications every four to eight weeks depending on your hair growth rate.
you may also like this:19+ Best Mens Haircuts Scandinavian Styles
Selecting the Right Color for Your Features
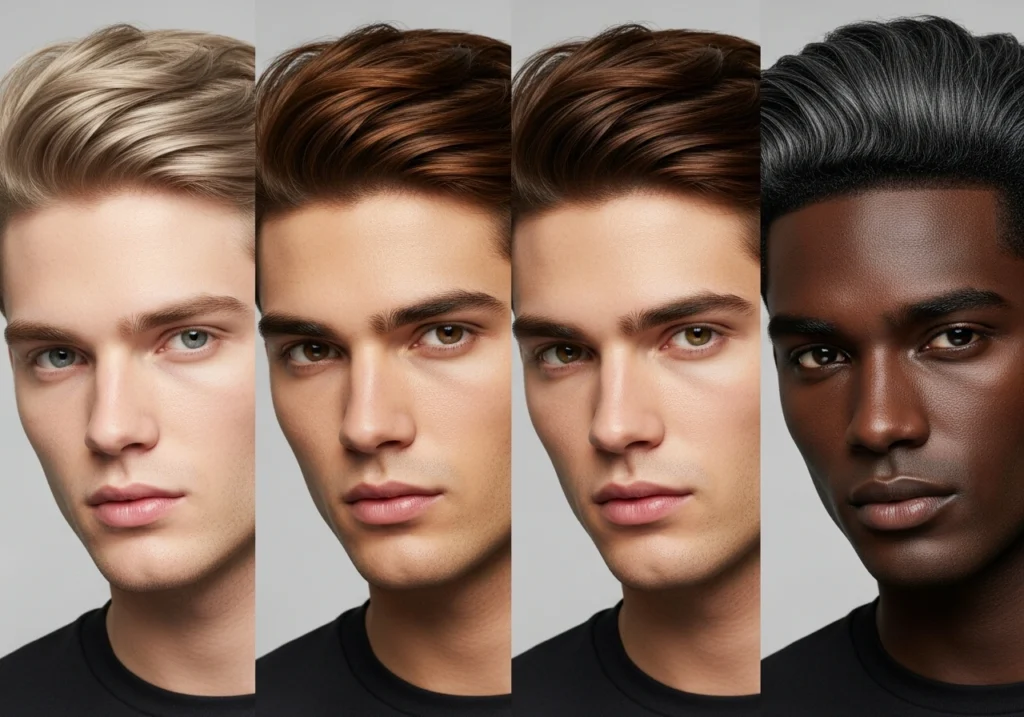
Choosing a hair color that complements your natural features makes the difference between a flattering transformation and an unflattering mismatch. Your skin tone and undertones should guide your color selection.
Men with fair or light skin typically look best with light brown, chestnut, or auburn shades. Extremely dark colors can create too much contrast, making your features appear stark or washed out. If you have cool undertones, ash-based colors work beautifully, while warm undertones pair well with golden or honey-toned browns.
Medium skin tones offer the most versatility. Most hair colors complement medium complexions, from dark brown to natural black. Men with medium skin can experiment more freely with color choices, though considering your undertones still helps refine your selection.
Olive or warm-toned skin looks fantastic with rich, warm hair colors. Auburn, burgundy, and deep brown shades complement the golden undertones naturally present in olive complexions. These colors create harmonious, natural-looking results that enhance rather than fight against your natural coloring.
Dark skin tones shine with natural black and dark brown hair colors. These shades add definition without creating harsh contrast. While lighter colors can work with professional application, darker shades typically provide the most flattering and natural-looking results for at-home dyeing.
When selecting your specific shade, most experts recommend staying within two shades darker or one shade lighter than your natural hair color, especially for your first home dyeing experience. Dramatic color changes require more technical skill and often benefit from professional application. Going lighter typically proves more challenging than going darker because it requires bleaching to remove your natural pigment before depositing the new color.
Essential Supplies and Preparation

Proper preparation prevents common mistakes and protects both you and your surroundings from staining. Gather all necessary supplies before beginning the dyeing process.
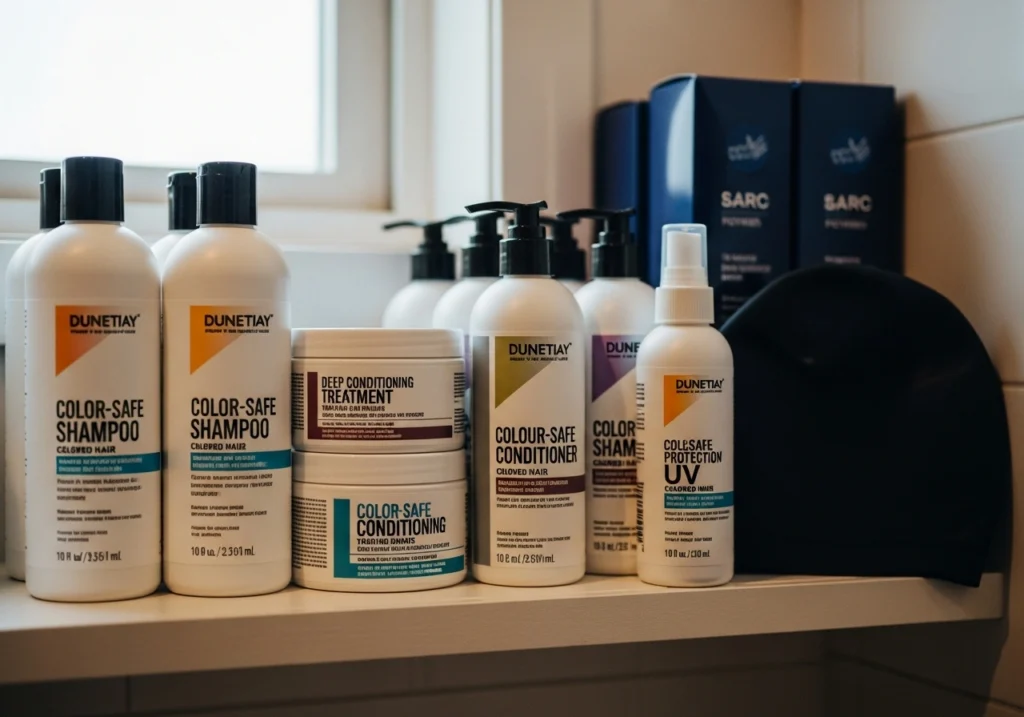
Your hair dye kit should include the color formula, developer if required, protective gloves, an applicator bottle or brush, and often a conditioning treatment. Additional items you’ll need include old towels you don’t mind staining, petroleum jelly, a wide-toothed comb, plastic clips for sectioning hair, a timer, and old clothing that can get stained.
Prepare your workspace in your bathroom where you have access to a mirror, good lighting, and running water. Clear your countertop of any items that could get stained. Lay down old towels to catch drips and make cleanup easier. The cleaner and more organized your workspace, the smoother your dyeing experience will be.
Perform an allergy patch test at least 48 hours before your planned dyeing session. Mix a small amount of the dye according to package directions, then apply a coin-sized amount behind your ear or on the inside of your elbow. Leave it uncovered for the full processing time, then rinse and monitor the area for 48 hours. If you experience redness, swelling, itching, or burning, you’re having an allergic reaction and should not use that product.
Wash your hair one to two days before dyeing rather than immediately before. This allows your scalp’s natural oils to provide some protection against potential irritation from the dye chemicals. Avoid using styling products during this period to prevent buildup that could interfere with color absorption.
The Application Process Step by Step
Once you’ve completed your preparation, follow these steps for successful home hair dyeing. Always read your specific product’s instructions carefully, as different brands may have slight variations in their recommended process.
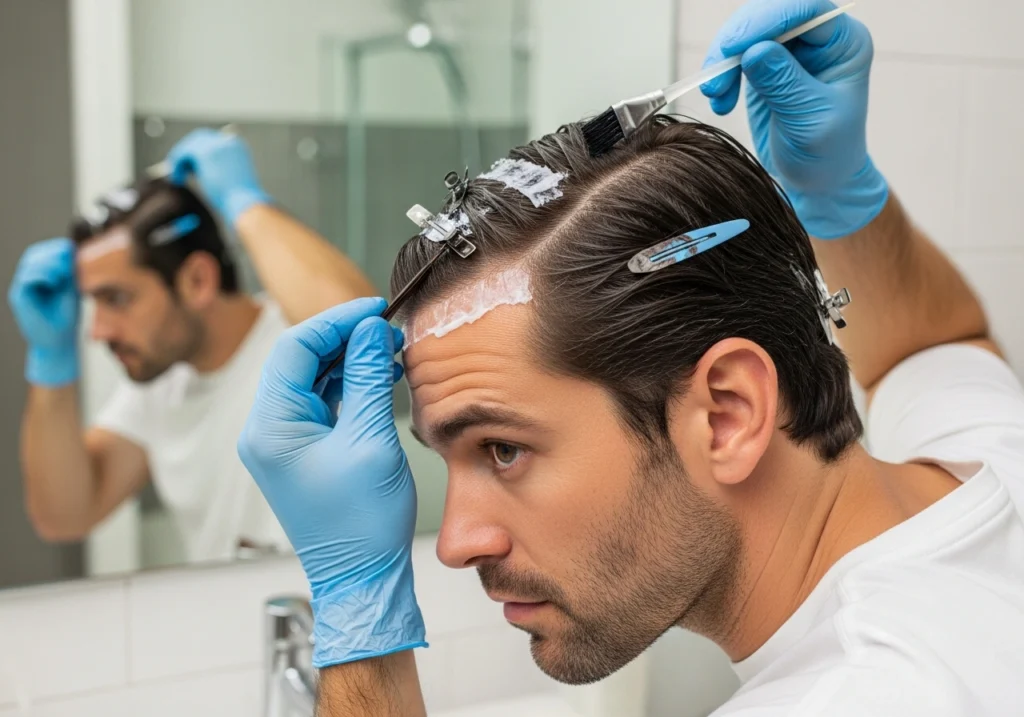
Put on the protective gloves included with your kit. This step is non-negotiable unless you want your hands to match your new hair color. Hair dye stains skin easily and can take several days to fade completely.
Apply petroleum jelly around your hairline, on your ears, and along the back of your neck. This creates a protective barrier that prevents dye from staining your skin. Use a generous amount and blend it into your skin well. Avoid getting petroleum jelly on your hair, as it will prevent the dye from absorbing properly in those areas.
Mix your dye components according to the package instructions. Some kits come pre-mixed while others require you to combine a color tube with a developer solution. Mix thoroughly until you achieve a uniform consistency without lumps.
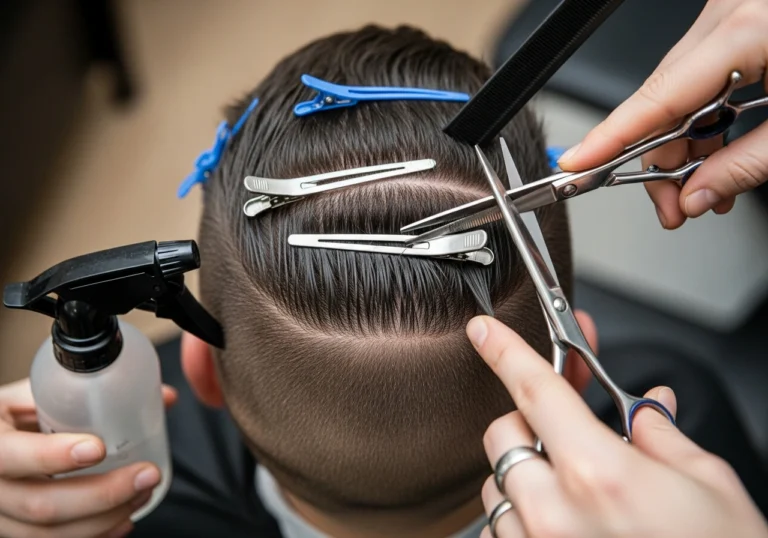
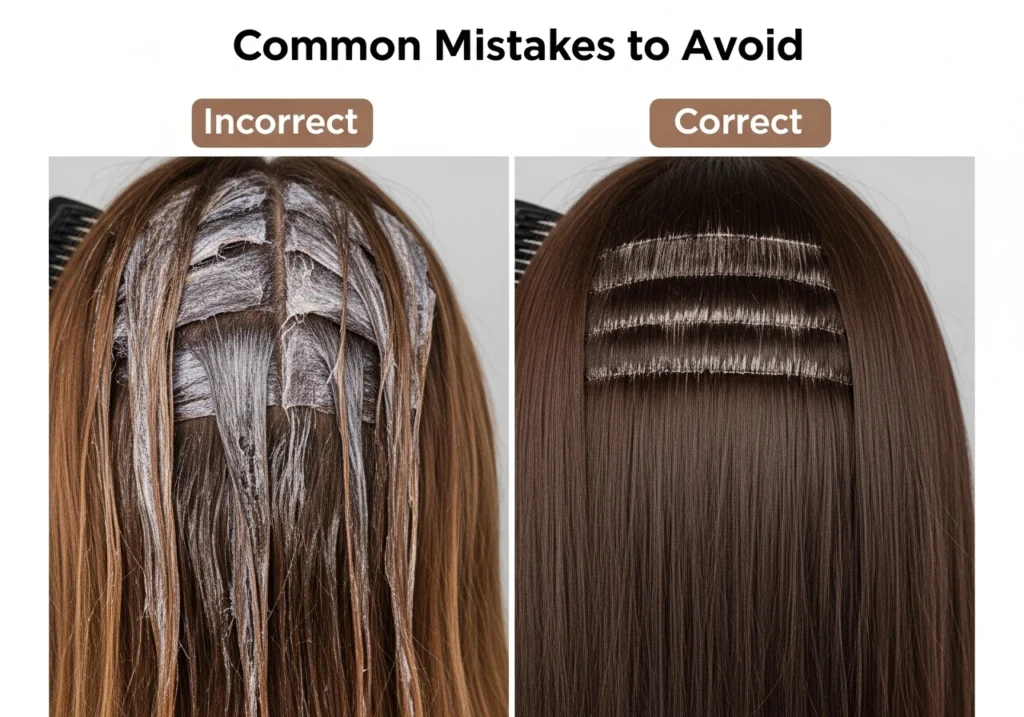
Section your hair into four quadrants by parting it down the middle from front to back, then creating a horizontal part from ear to ear. Clip each section out of the way using plastic clips. Working in sections ensures even coverage and prevents you from missing spots.
Start applying dye to one of the front sections first. If this is your first time coloring, apply the dye from roots to ends, saturating each strand completely. If you’re touching up previously colored hair, apply to your roots first, let them process for the recommended time minus 10 minutes, then pull the color through to your ends for the final 10 minutes. This prevents your ends from becoming overly dark since previously colored hair absorbs dye more readily than virgin hair.
Work the dye through each section systematically, using your applicator brush or bottle to ensure complete saturation. Pay extra attention to the back of your head, where it’s harder to see what you’re doing. Don’t be shy with the product. Skimping on dye leads to uneven, patchy results.
Once you’ve covered all sections, use your gloved hands or a comb to work the dye through your hair, ensuring every strand is coated. Set a timer for the processing time recommended on your package, typically between 20 and 45 minutes depending on the dye type and your desired intensity.
Resist the urge to check your color constantly during processing. Each time you wipe away dye to check, you interrupt the chemical process. If you must check, do so only once about five minutes before the minimum recommended time. Wipe a small section clean with a damp towel to assess the color development.
When your timer goes off, hop in the shower and rinse your hair thoroughly with lukewarm water. Rinse until the water runs completely clear. Depending on your dye type, you may need to shampoo or skip shampooing. Permanent dyes typically require shampooing to remove residual chemicals, while semi-permanent dyes often recommend water-only rinsing to maximize color longevity.
Apply the conditioning treatment if one was included with your kit. These conditioners contain ingredients that help close your hair cuticle, seal in color, and restore moisture after the chemical process. Leave the conditioner on for the recommended time before rinsing thoroughly.
Special Considerations for Gray Coverage
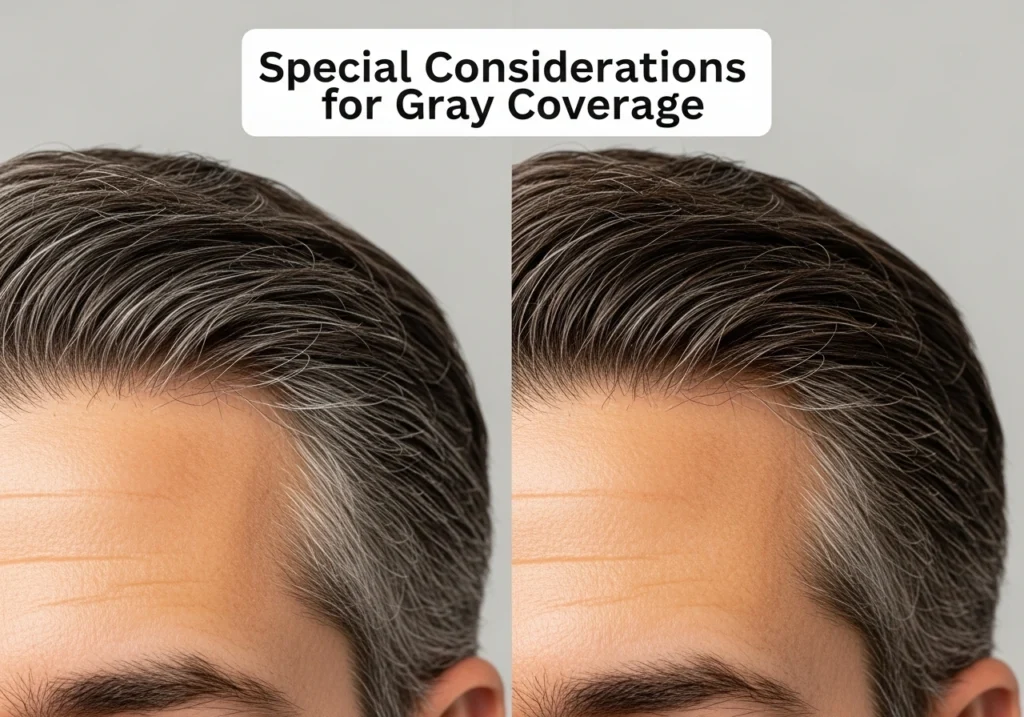
Covering gray hair presents unique challenges that require specific strategies for natural-looking results. Gray hairs have a different texture than pigmented hairs. They tend to be coarser and more resistant to dye absorption.
When selecting a color for gray coverage, choose a shade that matches your natural hair color or is slightly lighter. Going too dark can look unnatural and harsh, especially if you have significant graying. Many men achieve the most natural results by choosing a color one or two shades lighter than they think they need.
If you have less than 50 percent gray coverage, semi-permanent dyes can blend grays beautifully without completely eliminating them. This creates a salt-and-pepper effect that looks more natural than solid color.
For more extensive gray coverage exceeding 50 percent, permanent dye provides the most reliable results. Pay special attention to application on gray areas, as they often require slightly longer processing time to achieve full coverage. Some men find that applying dye to gray areas first, then moving to the rest of their hair, produces more even results.
Consider using products specifically formulated for men’s hair when covering gray. These products often come in more limited color ranges focused on natural shades and are designed to work with the typically coarser texture of men’s hair.
Maintaining Your Newly Colored Hair
Proper maintenance extends the life of your color and keeps your hair healthy despite the chemical processing involved in dyeing.
Switch to color-safe shampoo and conditioner immediately after your first dye job. These products contain gentler cleansers that won’t strip color as quickly as regular formulas. Sulfate-free options work particularly well for color-treated hair.
Reduce your washing frequency to preserve color longer. If you currently wash daily, try stretching to every other day or every third day. This reduces the number of times your color is exposed to water and cleansing agents that cause fading. On non-washing days, use dry shampoo if needed to absorb oil and refresh your scalp.
Wash your hair with cool or lukewarm water rather than hot water. High temperatures open your hair cuticle, allowing color molecules to escape more easily. Cool water helps seal the cuticle and lock color in.
Limit your exposure to chlorine and salt water, both of which can fade and discolor dyed hair. If you swim regularly, wear a swim cap or rinse your hair immediately after swimming and apply a deep conditioning treatment.
Protect your hair from sun exposure, which fades color over time. Wear a hat when spending extended time outdoors, or use leave-in products containing UV protection.
Plan for regular touch-ups to maintain your color as your hair grows. With permanent dye, you’ll typically need root touch-ups every four to eight weeks depending on your hair growth rate and how much contrast exists between your natural color and your dyed color. Semi-permanent colors require full reapplication every few weeks as the color fades.
Use weekly deep conditioning treatments to maintain hair health. Dyeing, especially with permanent color, can be drying. Regular conditioning treatments restore moisture, improve shine, and keep your hair looking its best.
Common Mistakes to Avoid
Learning from others’ errors helps you achieve better results on your first attempt. These common mistakes plague many first-time home hair dyers.
Skipping the allergy test might seem like a time-saver, but allergic reactions to hair dye can be severe. Always perform the patch test 48 hours before dyeing, no matter how rushed you feel.
Not reading the instructions thoroughly leads to application errors and disappointing results. Each product has specific mixing ratios, application methods, and timing requirements. Taking ten minutes to read and understand the directions prevents hours of regret.
Using insufficient product creates patchy, uneven color. Most men with short hair need one box of dye, while those with medium to longer hair may require two boxes. Having extra product available is always better than running out mid-application.
Applying dye to dirty or product-laden hair prevents proper color absorption. Washing one to two days before dyeing strikes the right balance between clean hair and protective natural oils.
Leaving dye on too long won’t make your color more intense. It can, however, damage your hair and cause excessive dryness. Similarly, not leaving it on long enough results in faded, lackluster color that washes out quickly.
Forgetting to protect your skin from staining causes frustration. The petroleum jelly barrier around your hairline and ears takes only a minute to apply but prevents days of walking around with telltale dye marks.
Attempting dramatic color changes at home often disappoints. Going from dark brown to platinum blonde or trying to achieve vivid fashion colors requires professional skills and products. Save dramatic transformations for salon visits and stick to subtle changes for home applications.
Advanced Techniques and Considerations
Once you’ve mastered basic all-over color, you might want to explore more advanced options.
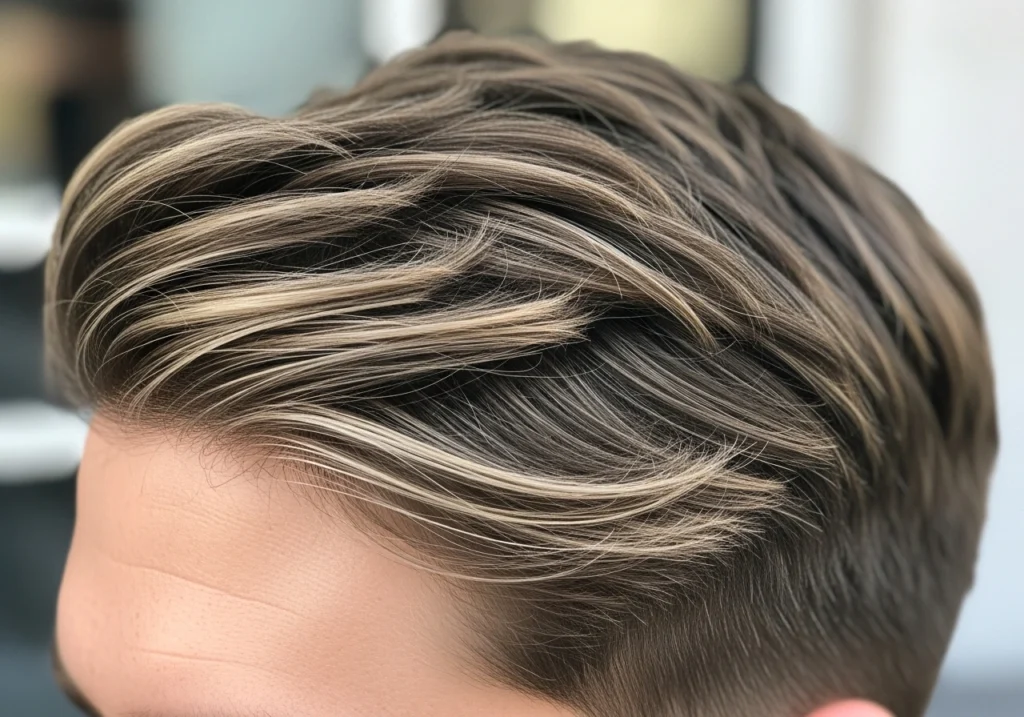
Highlights create dimension and can subtly blend gray hair. However, highlighting at home proves challenging. The technique requires precise placement and often involves bleaching, which can easily go wrong without proper training. If you want highlights, consider consulting a professional or starting with very subtle, minimal highlighting until you develop the necessary skills.
Dyeing your beard requires special consideration. Beard hair tends to be coarser and more resistant to dye than scalp hair. More importantly, the skin on your face is more sensitive than your scalp. Always use products specifically formulated for beards and facial hair rather than regular hair dye. These products are tested for safety near facial skin and contain gentler formulations.
Bleaching your hair to go lighter or to create a base for fashion colors should generally be left to professionals. Bleach is an aggressive chemical that can cause severe damage when used incorrectly. Over-bleaching can literally dissolve your hair. If you’re determined to bleach at home, research extensively, use quality products designed for home use, and start conservatively.
Correcting color mistakes requires patience and sometimes professional help. If your color turns out too dark, you may be able to fade it somewhat by washing with clarifying shampoo. If it’s too light, you can carefully apply a darker shade. For more serious mistakes like green tones or extreme brassiness, consult a professional colorist who can properly assess and correct the issue.
When to Seek Professional Help

While home dyeing works well for many men, certain situations call for professional expertise. If you’re attempting a dramatic color change involving more than two shades of difference from your natural color, a salon visit provides better results and less risk of damage.
First-time gray coverage covering more than 75 percent of your hair benefits from professional application. Stylists have techniques and products that ensure even, natural-looking coverage on heavily gray hair.
Correcting previous color mistakes, whether from home or salon applications, requires professional skill. Colorists understand color theory and have access to professional-grade color removers and correctors that aren’t available for home use.
If you have any hesitation about the process or feel overwhelmed by the options, consulting a stylist for your first dyeing experience can be worthwhile. You can observe their technique, ask questions, and gain confidence before attempting future applications at home.
Conclusion
Dyeing your hair at home empowers you to maintain your appearance on your schedule while saving money compared to regular salon visits. Success requires proper preparation, careful product selection, and attention to detail during application. Start with realistic expectations, choosing colors close to your natural shade for your first attempts. As you gain experience and confidence, you can experiment with different colors and techniques. Remember that hair dye is temporary. Even permanent color grows out or can be changed. This knowledge should give you the confidence to experiment and find the look that makes you feel your best. With the information provided in this guide, you’re well-equipped to achieve salon-quality results in the comfort of your own home.
Frequently Asked Questions
How long does home hair dye last?
The longevity of your hair dye depends on the type you choose. Temporary dyes wash out after one shampoo. Semi-permanent colors last 12 to 24 washes, typically four to six weeks with regular washing. Demi-permanent dyes survive about 24 to 30 washes, approximately six to eight weeks. Permanent hair dye never completely washes out, though it fades over time. You’ll need root touch-ups every four to eight weeks as new growth appears. Using color-safe products and washing less frequently extends the life of any dye type.
Can I dye my hair if I have sensitive skin?
Men with sensitive skin can dye their hair but should take extra precautions. Always perform a patch test 48 hours before dyeing to check for allergic reactions. Consider using ammonia-free or natural dye formulations, which tend to be gentler on skin. Apply a thick layer of petroleum jelly around your hairline to prevent dye from touching your skin. If you experience scalp irritation during dyeing, rinse the product out immediately. Some men find semi-permanent dyes less irritating than permanent formulas since they don’t require strong developers.
What should I do if my color turns out too dark?
If your hair color appears darker than desired, don’t panic. Permanent hair color often looks darker immediately after application and lightens slightly after a few washes. Try washing your hair with a clarifying shampoo, which strips some color. Washing with hot water can also help fade color faster, though this is drying to your hair. If the color remains too dark after several washes, you can visit a salon for professional color correction, or wait for it to fade naturally over a few weeks before adjusting. For future applications, choose a shade lighter than your target color or reduce processing time slightly.
Do I need to bleach my hair before dyeing it a different color?
Bleaching is only necessary when you want to go significantly lighter than your current color or achieve bright fashion colors like blue, pink, or platinum blonde. If you’re going darker or staying within a few shades of your current color, you don’t need to bleach. Hair dye cannot lighten previously colored or naturally dark hair without bleach. The general rule states you can go darker without bleaching, but going lighter requires bleach to remove existing pigment before depositing new color. Bleaching is complex and damaging when done incorrectly, so consider professional help for this process.
How often should I touch up my roots?
Touch-up frequency depends on several factors including your hair growth rate, how much contrast exists between your natural and dyed color, and your personal tolerance for visible roots. Most men need root touch-ups every four to eight weeks. Those with faster-growing hair or high contrast between colors may need more frequent applications. If you’re only covering scattered gray hairs, you might stretch longer between applications. Pay attention to when your roots become noticeable to you, and plan your touch-ups accordingly. Avoid dyeing more frequently than every four weeks, as this can cause excessive damage to your hair.