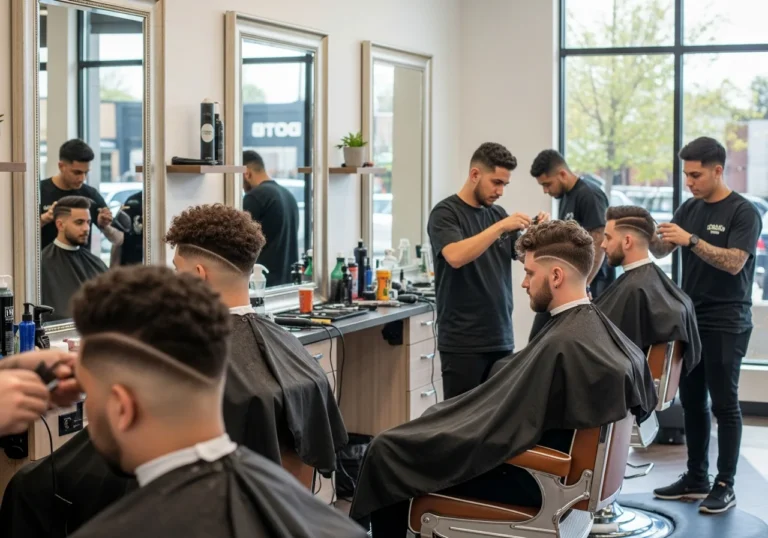

How To Cut Mens Long Curly Hair At Home
Learning to cut your own long curly hair at home can save money, give you complete control over your style, and help you maintain your desired length between professional appointments. While many men with curly hair feel intimidated by the prospect of trimming their own locks, the process becomes manageable once you understand the unique characteristics of curly hair and follow proper techniques. This comprehensive guide will walk you through everything you need to know about cutting men’s long curly hair at home, from selecting the right tools to executing precise cuts that enhance your natural texture.
Curly hair behaves differently than straight hair, which means traditional cutting methods often produce disappointing results. The coiled nature of curls creates shrinkage, making hair appear shorter when dry than when wet. Additionally, each curl has its own personality, springing up at different angles and lengths. Understanding these fundamentals will prevent common mistakes and help you achieve a professional-looking result from the comfort of your own bathroom.
Understanding Your Curl Pattern Before Cutting
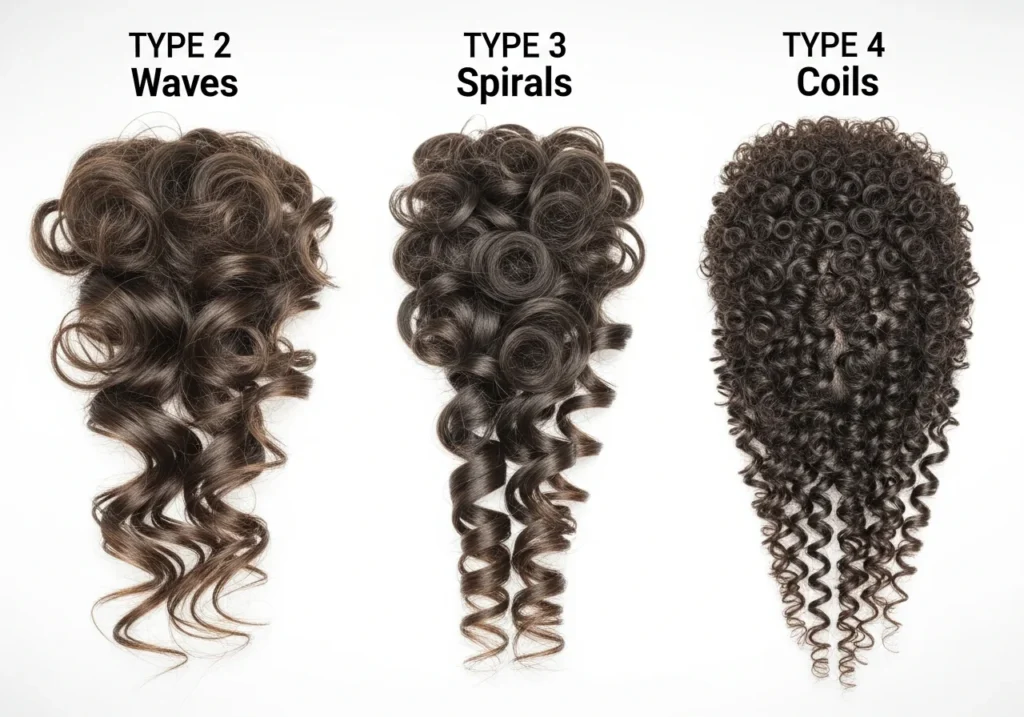
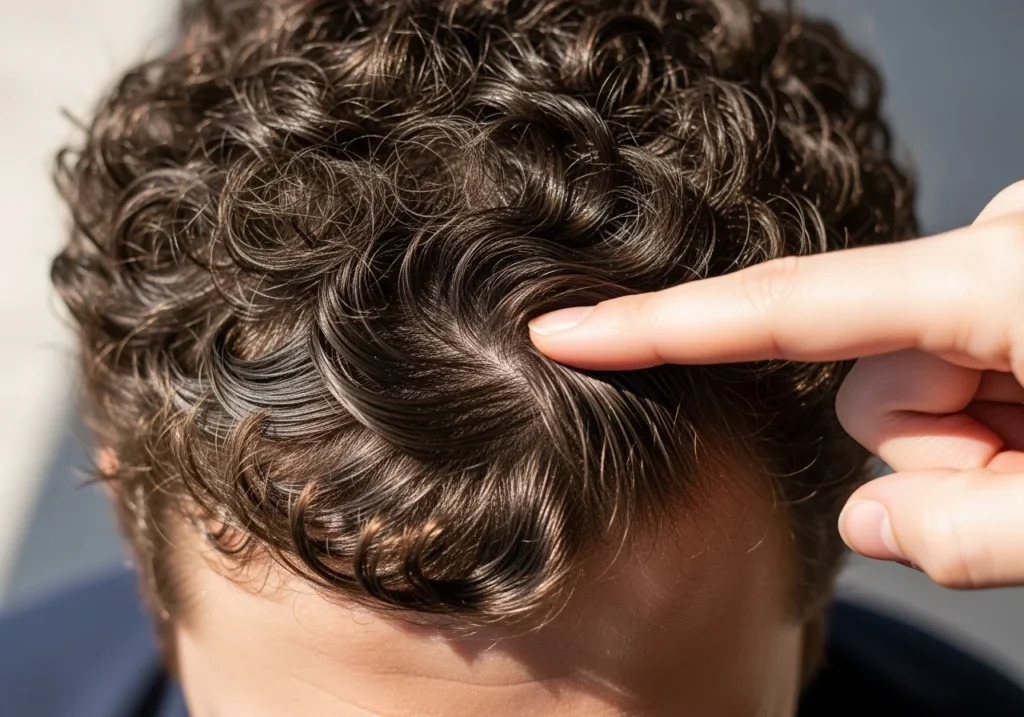
Before picking up scissors, you need to thoroughly understand your specific curl type. Curly hair ranges from loose waves to tight coils, and each pattern requires slightly different cutting approaches. Type 2 hair features gentle waves with some texture, while Type 3 curls form distinct spiral patterns. Type 4 hair creates tight coils or zigzag patterns with significant shrinkage. Identifying your curl pattern helps you predict how much length you will lose when your hair dries and springs up.
Most men with long curly hair have a combination of curl patterns throughout their head. The hair at your crown might curl tighter than the hair around your temples. The nape of your neck could have looser waves compared to the sides. Examining your hair when completely dry and in its natural state reveals these variations. Take time to study how your curls fall, where they clump together, and which sections have more volume. This knowledge guides your cutting strategy and prevents you from removing too much length from areas that already experience significant shrinkage.
The porosity of your hair also affects how you should approach cutting. High porosity hair absorbs moisture quickly but loses it just as fast, which can make curls appear frizzy and undefined. Low porosity hair resists moisture but maintains its shape well once styled. Medium porosity hair strikes a balance between the two extremes. Understanding porosity helps you decide whether to cut your hair wet or dry, as high porosity hair shows its true length better when dry, while low porosity hair can be cut either way.
Essential Tools For Cutting Curly Hair At Home
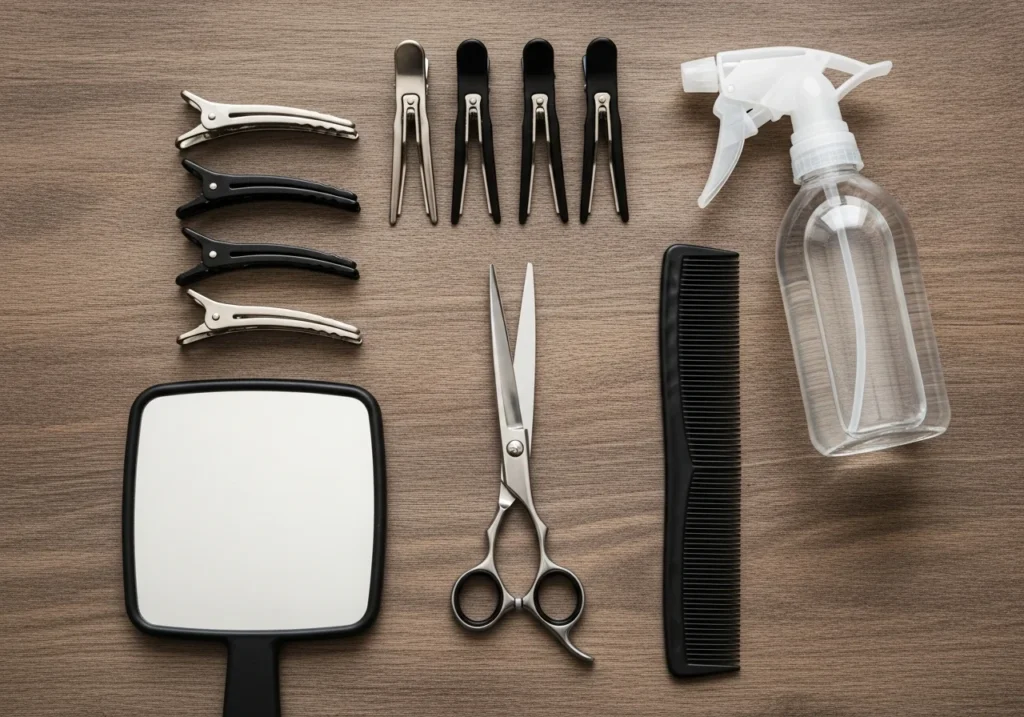
Investing in quality tools makes the difference between a professional-looking cut and a disaster. Sharp haircutting scissors are non-negotiable. Kitchen scissors or dull blades will create split ends and damage your curl structure. Professional shears designed for hair cutting feature beveled edges that slice cleanly through strands without crushing them. A pair of six to seven-inch scissors provides the control needed for precision work while remaining comfortable during extended cutting sessions.
A wide-tooth comb helps section your hair without disrupting your curl pattern. Metal or plastic combs with closely spaced teeth can cause breakage and frizz in curly hair. The wider spacing allows you to detangle gently while maintaining your natural texture. Some men prefer using their fingers instead of combs, which works well for those with very tight curl patterns that tangle easily with any implement.
Sectioning clips keep hair organized during the cutting process. Without proper sectioning, you risk cutting unevenly or missing entire areas. Four to six large clips allow you to divide your hair into manageable portions. A spray bottle filled with water helps refresh curls if they start to dry out during cutting, though you may not need this if you choose the dry cutting method. A handheld mirror lets you view the back of your head, which is essential for achieving an even cut all around.
Preparing Your Hair For The Cut
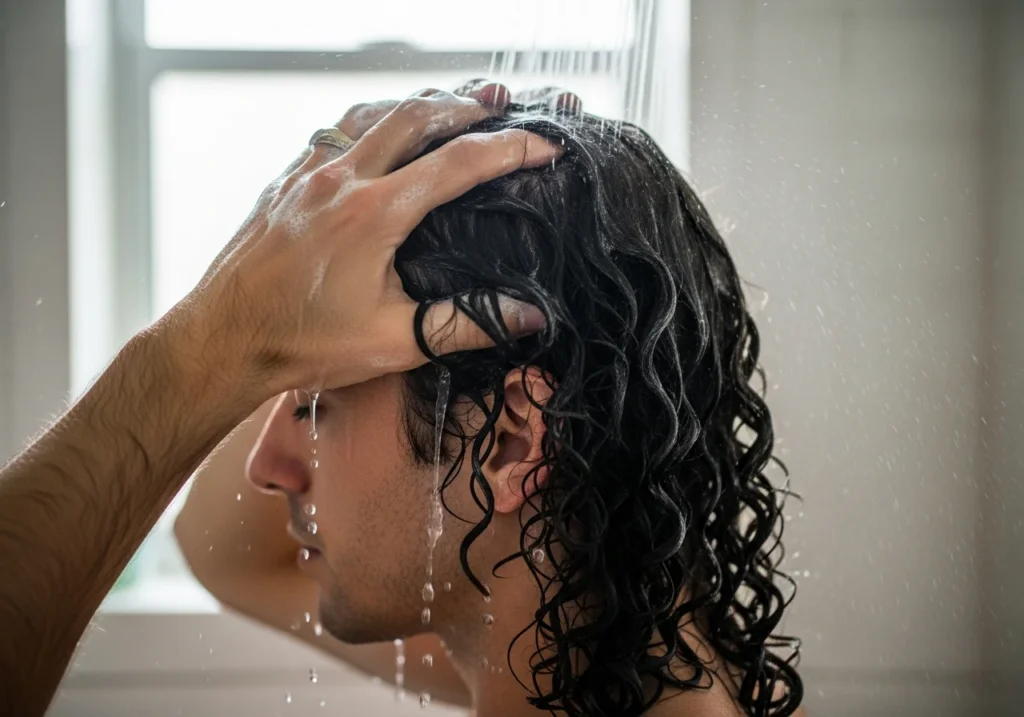
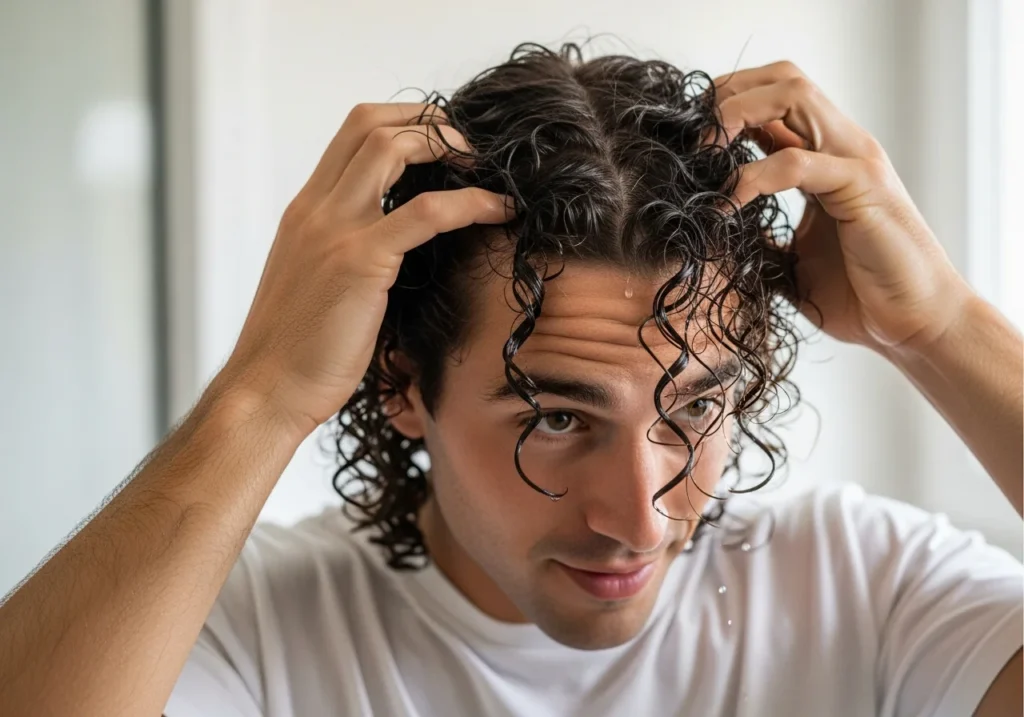
Proper preparation sets the foundation for a successful haircut. Start by washing your hair with a moisturizing shampoo to remove product buildup, oil, and dirt. Clean hair shows its true texture and curl pattern, allowing you to make accurate decisions about where and how much to cut. Follow with a nourishing conditioner that adds slip and makes detangling easier. Some men prefer to add a leave-in conditioner after washing, which helps define curls and makes them easier to work with during cutting.
The decision between cutting wet or dry remains one of the most debated topics in curly hair care. Cutting wet allows you to see the shape more clearly and work with stretched hair that is easier to section. However, wet cutting can lead to removing more length than intended because curls shrink significantly as they dry. Cutting dry lets you see exactly how your curls will look after styling, preventing the shock of unexpected shortness. The dry cutting method works especially well for men who want to maintain maximum length while removing damaged ends or creating shape.
If you choose wet cutting, apply your hair when it is damp rather than soaking wet. Hair that drips water is too saturated and will shrink dramatically when dry. Gently squeeze excess moisture with a microfiber towel or old t-shirt, leaving hair damp enough to stretch but not dripping. For dry cutting, let your hair air dry completely in its natural state without applying heavy styling products that could mask its true length and texture. Light products that define curls without weighing them down are acceptable.
Sectioning Your Hair Properly
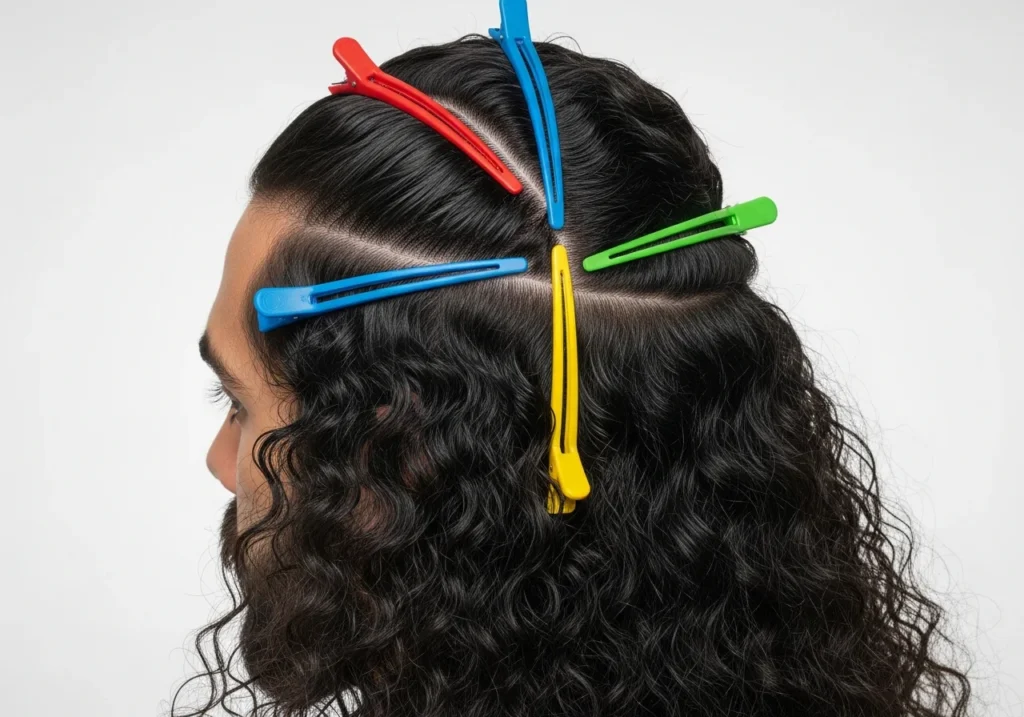
Systematic sectioning ensures you cut evenly across your entire head. Begin by dividing your hair into four main quadrants. Create a part down the center of your head from your forehead to the nape of your neck. Then make a horizontal part from ear to ear across the top of your head. This creates four sections: front left, front right, back left, and back right. Secure each section with a clip, starting with the back sections since you will likely cut the front last.
Within each quadrant, you may need to create smaller subsections depending on your hair density and length. Thick, dense hair requires more divisions to ensure you reach all layers. Create horizontal subsections about one to two inches wide by taking small portions of hair from each quadrant. Work from bottom to top within each section, leaving the upper layers clipped until you finish the lower portions. This methodical approach prevents you from cutting the same section twice or missing areas entirely.
The way you hold each section during cutting affects the final result. Holding hair straight up from your scalp creates layers and volume at the crown. Pulling sections down toward your shoulders maintains length and creates a more uniform perimeter. For men wanting minimal layering with maximum length, hold sections at a slight downward angle. Those seeking volume and movement should hold sections perpendicular to the scalp. Experiment with holding angles on small test sections before committing to cutting your entire head.
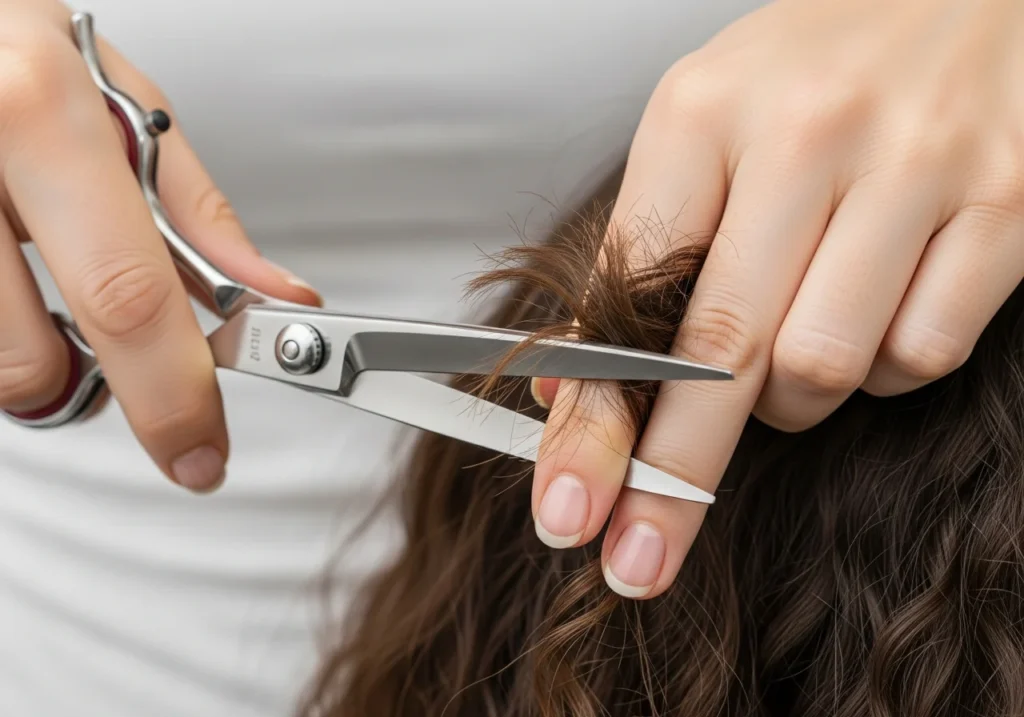
The Twist And Snip Method
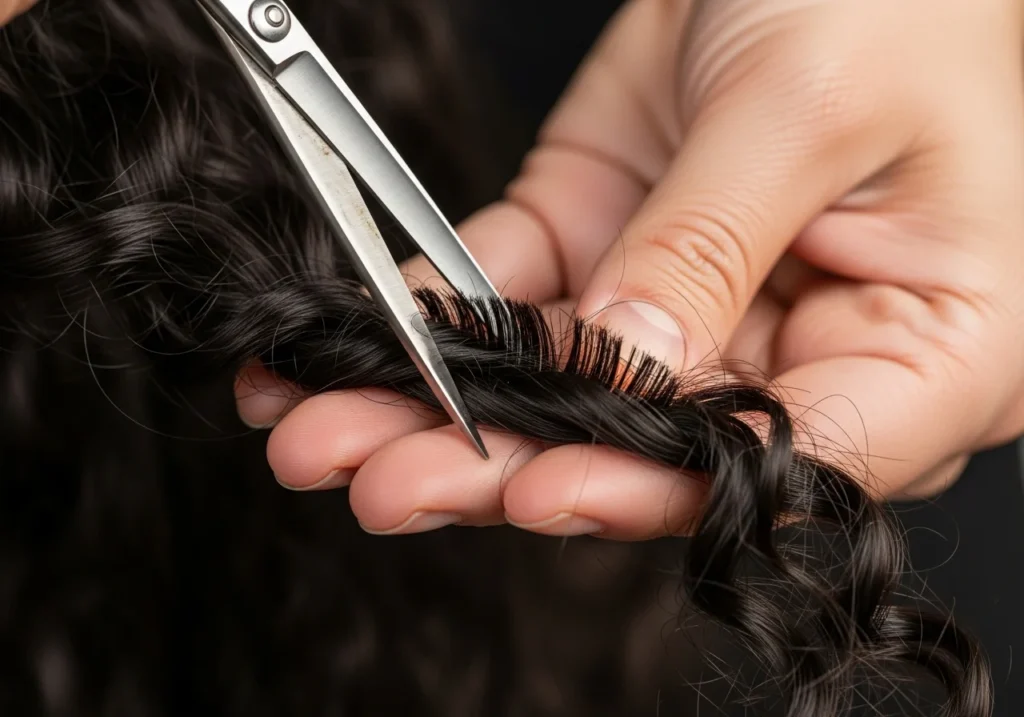
The twist and snip technique works exceptionally well for men with curly hair because it respects the natural curl pattern while removing damaged ends. Select a small section of hair containing one or several curl clumps. Gently twist the section in the direction your curls naturally form, which tightens the spiral and makes damaged ends protrude from the twist. These frayed, split ends stick out from the twisted section like tiny branches.
Hold the twisted section taut and carefully snip away the protruding damaged ends with your scissors. Work slowly, removing only the obviously damaged portions. This method preserves length while eliminating splits and breakage. After snipping, untwist the section and observe how the curl springs back. The curl should appear more defined and healthy without split ends weighing it down. Move to the next section and repeat the process throughout your entire head.
This technique requires patience but delivers excellent results for men who want to maintain length while improving hair health. The twist method works best on dry hair where you can clearly see damage and curl definition. Some men perform this maintenance technique every few weeks to stay ahead of split ends without scheduling full haircuts. The cumulative effect of regular twist and snip sessions keeps curls looking fresh and prevents damage from traveling up the hair shaft.
Creating Shape With Point Cutting

Point cutting adds texture and removes bulk without creating harsh lines in curly hair. This technique involves holding your scissors vertically and snipping into the ends of hair sections at an angle. Instead of cutting straight across, you create small V-shaped notches that thin out thick sections and blend layers naturally. Point cutting works particularly well for men with very dense curls that can appear triangular or mushroom-shaped without proper texturizing.
Hold a small section of hair between your fingers, extending it away from your head at the desired cutting length. Position your scissors vertically so the tips point toward your scalp and the blades run parallel to the hair shaft. Gently snip into the ends of the section, removing small amounts with each cut. Work your way across the entire section, creating multiple small cuts rather than one large chop. This graduated approach prevents removing too much length while achieving the desired texture.
The depth of your point cuts determines how much texture you create. Shallow cuts that barely penetrate the hair section create subtle texture, while deeper cuts thin more aggressively. For men with extremely thick curly hair, deeper point cuts help reduce bulk and allow curls to move more freely. Those with fine or medium density hair should use shallow point cuts to avoid creating sparse, stringy ends. Practice this technique on small sections first to develop a feel for how much to remove.
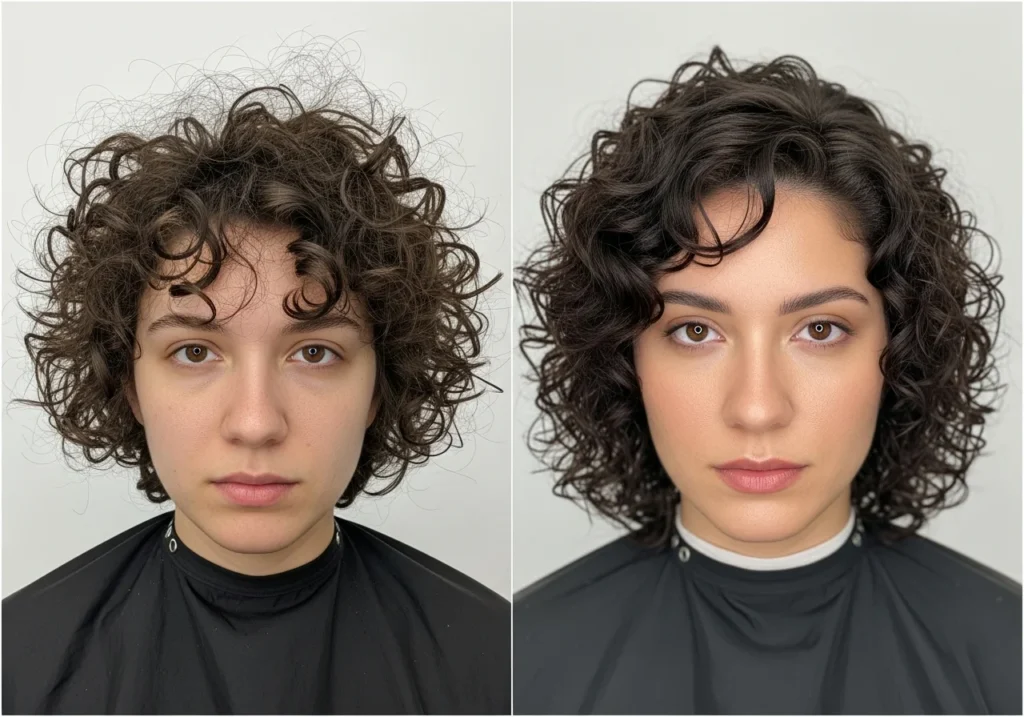
Trimming The Perimeter And Shape
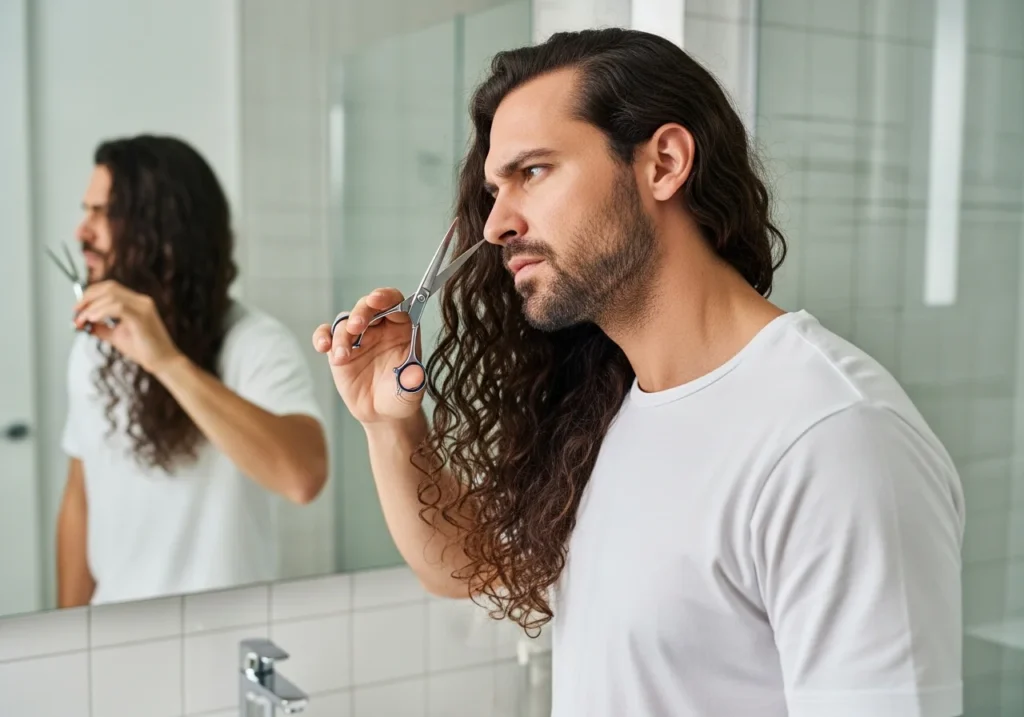
Establishing a clean perimeter gives your long curly hair a polished appearance. The perimeter refers to the outermost edge of your hair where it meets your neck, shoulders, and face. Even men who prefer a natural, free-flowing style benefit from tidying the perimeter to remove straggly ends and create definition. Decide on your desired length before beginning, keeping in mind that curls will shrink as they dry if you are cutting wet.
For a straight perimeter across the back, gather all your hair and pull it over one shoulder to the front. This allows you to see the ends clearly in a mirror. Use your fingers or a comb to establish a straight guideline at your desired length. Cut small sections at a time, following your guideline and checking frequently that both sides remain even. Some men prefer a slightly curved or V-shaped perimeter that follows the natural drape of their curls. This shape often looks more flattering and creates a softer appearance than a blunt straight line.
The hair around your face requires special attention since it frames your features. Decide whether you want face-framing pieces that are shorter than the rest of your hair or if you prefer uniform length throughout. Face-framing layers can highlight your cheekbones and create dimension, but they also require more maintenance. If cutting face-framing pieces, work with small sections and cut conservatively. You can always remove more length, but you cannot add it back once cut.
Dealing With Shrinkage And Uneven Curls

Shrinkage presents one of the biggest challenges when cutting curly hair at home. Depending on your curl pattern, your hair might shrink anywhere from twenty to seventy-five percent of its stretched length. This means a curl that measures ten inches when pulled straight might rest at only four inches when allowed to coil naturally. Failing to account for shrinkage results in hair that appears much shorter than intended after it dries.
Combat shrinkage surprises by cutting conservatively during your first several attempts. Remove less length than you think you want, then reassess after your hair dries completely. Many men benefit from a two-stage cutting process where they perform an initial trim, let their hair dry overnight, then fine-tune the cut the following day. This approach prevents the common mistake of cutting too much length in pursuit of evening out sections that naturally shrink at different rates.
Uneven curl patterns throughout your head require customized cutting strategies. Tighter curls that shrink more dramatically need less aggressive cutting than looser curls in other areas. Identify which sections of your hair have the tightest coils and cut those areas last, after you have established length on the looser sections. This allows you to match the finished length of tighter sections to the already-cut looser sections, creating a more uniform appearance despite varying curl patterns.
Managing Layers In Long Curly Hair

Layers add movement and reduce the triangular shape that often plagues men with long curly hair. Without layers, weight accumulates at the bottom of long curls, pulling them down and creating a heavy, flat appearance at the crown with excessive bulk at the ends. Strategic layering redistributes volume throughout your hair, creating a more balanced silhouette. However, layers in curly hair require a delicate touch because too much layering creates frizz and destroys curl clumps.
The elevation method helps create controlled layers at home. Select a section of hair from the top of your head and hold it straight up, perpendicular to your scalp. This is ninety-degree elevation. Cut the desired amount from the ends of this section while maintaining this angle. When you release the hair, it will create a subtle layer that adds volume at the crown. Work through the top sections of your head using this method, then move to the sides while gradually decreasing the elevation angle to forty-five degrees for less dramatic layering.
Men who want minimal layering should focus on cutting only the top sections while leaving the sides and back relatively uniform in length. This creates just enough movement to prevent flatness without extensive layering throughout. Those seeking maximum volume and texture can layer more aggressively through all sections. Keep in mind that highly layered curly hair requires more styling effort to look polished, as shorter layers may stick out or frizz more easily than longer, weighted sections.
Cutting Around Problem Areas
Certain areas of the head present unique challenges when cutting long curly hair. The cowlick at the crown often features hair that grows in a circular pattern, creating a spot where curls stick up or refuse to lay flat. Cutting this area too short emphasizes the cowlick, making it more noticeable. Instead, maintain enough length and weight to help cowlick hair blend with surrounding sections. Some men find that leaving crown hair slightly longer than the rest creates the weight needed to control stubborn growth patterns.
The nape of the neck frequently has finer hair with a different curl pattern than the rest of your head. This hair might be wavier or straighter, requiring less aggressive cutting to match the length of tighter curls on top. Use small, conservative cuts in this area and check frequently from multiple angles. The hair around your ears can stick out awkwardly if cut too short, creating a bushy appearance. Maintain enough length to weigh down these sections, or use point cutting to thin them without creating blunt edges that stick out.
Temple hair often grows at a different angle than the rest of your head, sometimes growing forward toward your face. This hair requires careful cutting to avoid creating pieces that stick out or curl in unwanted directions. Work with the natural growth pattern rather than fighting against it. If temple hair naturally wants to curl forward, cut it to a length that allows this while still looking intentional. Fighting natural growth patterns through cutting usually creates more problems than it solves.
Styling After Your Home Haircut
Proper styling reveals the true results of your home haircut and helps curls settle into their new shape. Begin with soaking wet hair immediately after showering. Apply a leave-in conditioner or curl cream to damp hair, using more product than you think you need. Curly hair requires generous moisture to define curls and prevent frizz. Distribute product evenly by raking it through with your fingers or using a wide-tooth comb, ensuring every section receives coverage.
The squish to condish method enhances curl definition after cutting. Cup sections of your hair in your palm and squeeze upward toward your scalp, pushing water and product into your curls. This scrunching motion encourages curls to form tight, defined spirals. Continue scrunching until your hair makes a squishy sound and feels saturated. Some men add a gel on top of their leave-in conditioner for additional hold and definition. Apply gel using the same scrunching method to avoid disrupting the curl pattern you just established.
Air drying produces the most natural results for long curly hair, though it requires patience. Resist touching your hair as it dries, as manipulation causes frizz and breaks up curl clumps. If you must speed the drying process, use a diffuser attachment on your blow dryer set to low heat and low speed. Cup sections of hair in the diffuser bowl and hold it close to your scalp without moving it around. Once your hair dries completely, you can scrunch out any crunchiness from gel by gently squeezing sections between your palms.
Maintaining Your Cut Between Trims

Regular maintenance extends the life of your home haircut and keeps curls looking healthy. Perform mini twist and snip sessions every two to three weeks to remove split ends before they worsen. This takes only fifteen to twenty minutes and prevents damage from traveling up your hair shaft. Focus on sections that see the most wear, such as the hair around your shoulders that rubs against clothing or the pieces around your face that you touch frequently.
Deep conditioning treatments restore moisture and strengthen curls between cuts. Apply a deep conditioner or hair mask once weekly, focusing on the ends of your hair where damage accumulates. Cover your hair with a shower cap and let the treatment sit for at least twenty minutes before rinsing. This regular moisture infusion keeps curls defined and prevents the dryness that leads to breakage. Some men add oils like coconut, argan, or jojoba to their routine for extra moisture and shine.
Protective styling at night prevents damage and maintains your haircut’s shape. Loose pineappling involves gathering your hair into a very loose, high ponytail on top of your head using a silk or satin scrunchie. This keeps curls from being crushed while you sleep and maintains volume at the roots. Alternatively, wearing a silk or satin bonnet protects your hair from friction against cotton pillowcases. These simple nighttime habits significantly reduce the damage that necessitates frequent trimming.
Common Mistakes To Avoid
Cutting too much length at once ranks as the most common mistake men make when cutting their own curly hair. The excitement of taking control of your hairstyle can lead to overenthusiastic cutting. Remember that you can always cut more during a second session, but you cannot reattach cut hair. Start by removing only one-quarter to one-half inch, then reassess. This conservative approach prevents the regret of realizing you removed too much length only after your hair dries and shrinks.
Using the wrong tools damages your hair and ruins your results. Dull scissors crush hair strands instead of slicing cleanly through them, creating split ends and frayed edges. Kitchen scissors, craft scissors, and other household cutting tools lack the proper blade angles for hair cutting. Invest in real haircutting shears, which pay for themselves by delivering professional results and lasting for years. Similarly, using fine-tooth combs or brushes on curly hair causes breakage and frizz. Stick with wide-tooth combs or your fingers for detangling.
Cutting curly hair while it is soaking wet leads to unpleasant surprises when it dries. Saturated hair stretches significantly, making it appear much longer than its true resting length. As it dries and contracts, you discover you removed far more length than intended. If you prefer wet cutting, work with damp hair that has been gently squeezed to remove excess water. Better yet, cut your hair when it is completely dry and styled in its natural state. Dry cutting eliminates guesswork about shrinkage and shows you exactly what you are getting.
Advanced Techniques For Experienced Home Cutters
Once you master basic cutting techniques, you can experiment with more advanced methods. Slide cutting creates seamless blending between layers by gliding closed scissors down the length of a hair section. This technique requires extremely sharp shears and a steady hand. Hold a section of hair taut and place your closed scissors against the hair shaft near the roots. Gently slide the scissors down toward the ends while maintaining light pressure. The scissors remove small amounts of hair along the entire length, creating soft, blended layers.
Invisible layering suits men who want the benefits of layers without obvious short pieces. This technique involves taking horizontal sections and cutting them at a slight angle rather than straight across. The angle creates subtle length variation that adds movement without distinct steps between layers. Work through your hair in one-inch horizontal sections, cutting each at a barely perceptible angle. The cumulative effect of these small variations creates dimension without obvious layering.
Curl-by-curl cutting provides the ultimate in customized results but demands significant time and patience. This method involves cutting each individual curl or curl clump to its ideal length based on how it falls and behaves. Work through your completely dry, styled hair, examining each curl and determining what length best suits its location and pattern. This technique works well for men with multiple curl patterns or those who want maximum control over their final shape. However, expect this process to take several hours for long hair.
When To Consider Professional Help

Recognizing when you need professional assistance prevents disappointing results and potential damage. If you want a dramatic change in length or style, visiting a professional stylist who specializes in curly hair gives you the best chance of success. Major cuts that involve removing several inches or completely restructuring your shape require expert precision. Similarly, if you desire a specific technique like a dry curly cut or DevaCut that you have not practiced, paying for professional execution ensures proper results.
Struggling with uneven cutting or feeling uncertain about your abilities signals a need for professional guidance. A skilled stylist can assess your work, fix any problems, and teach you techniques during your appointment. Many curl specialists offer consultations where they explain how your specific curl pattern should be cut and provide personalized advice. This education empowers you to execute better home cuts in the future while maintaining the option of professional services for more complex needs.
Persistent problems like excessive frizz, lack of curl definition, or damage despite your best home care efforts indicate you might benefit from professional evaluation. A stylist can examine your hair health, identify issues like heat damage or over-processing, and recommend treatments or cutting approaches to improve your hair’s condition. Sometimes professional intervention sets you on the right path, after which you can maintain progress with home trims and proper care.
Building Confidence In Your Cutting Skills

Developing skill and confidence in cutting your own long curly hair requires practice and patience. Start with conservative trims that focus on maintenance rather than dramatic changes. These low-stakes sessions let you familiarize yourself with how your scissors work, how your hair responds to cutting, and which techniques suit your curl pattern. Each successful trim builds confidence and teaches you something new about your hair.
Document your progress by taking photos before and after each cutting session. These visual records help you track your improvement and identify patterns in what works well versus what needs adjustment. Pay attention to which sections you consistently cut well and which areas challenge you. Over time, you will develop a personalized cutting strategy that accounts for your unique hair characteristics and skill level. Some men keep cutting journals where they note the techniques used, products applied, and results achieved.
Join online communities of men with long curly hair who cut their own hair. These groups offer support, advice, and inspiration. Members share their successes and failures, creating a collaborative learning environment. Watching video tutorials from other men with curl patterns similar to yours provides valuable visual instruction that text alone cannot convey. Remember that even professional stylists spent years honing their craft. Give yourself permission to learn gradually and celebrate small victories along the way.
Conclusion
Mastering the art of cutting your own long curly hair at home empowers you to maintain your desired style while saving time and money. The journey from novice to confident home cutter requires patience, practice, and a willingness to learn from mistakes. By understanding your unique curl pattern, investing in proper tools, and employing techniques designed specifically for curly hair, you can achieve professional-looking results in your own bathroom.
The key to success lies in working with your natural curl pattern rather than against it. Respect the way your hair grows, shrinks, and forms clumps. Cut conservatively, especially during your first several attempts, and remember that you can always remove more length but cannot restore what you have cut. Develop a systematic approach to sectioning and cutting that ensures even results throughout your head.
Regular maintenance between major cutting sessions keeps your long curly hair healthy and your style looking fresh. Incorporate twist and snip sessions, deep conditioning treatments, and protective styling into your routine. These habits minimize damage and reduce how often you need to perform full trims. As your skills improve, you will develop an intuitive understanding of what your hair needs and when it needs it.
Most importantly, embrace the learning process. Each cutting session teaches you something new about your hair and refines your technique. Build your confidence gradually through small, successful trims before attempting more ambitious cuts. Join communities of like-minded individuals, study techniques that appeal to you, and do not hesitate to seek professional help when needed. With time and practice, cutting your own long curly hair becomes not just a practical skill but a satisfying ritual of self-care that keeps you looking and feeling your best.
Frequently Asked Questions
How often should I trim my long curly hair at home?
Most men with long curly hair benefit from trimming every eight to twelve weeks to maintain healthy ends and shape. However, this timing varies based on your hair’s condition and how quickly damage develops. If you notice split ends, frizz, or loss of curl definition, you may need more frequent trims every six weeks. Men who use heat styling tools or chemical treatments should trim more often to remove damage before it spreads up the hair shaft.
Should I cut my curly hair wet or dry?
Cutting dry offers the most accurate results for curly hair because you can see exactly how your curls fall and how much shrinkage occurs naturally. Dry cutting prevents the common mistake of removing too much length and discovering your hair is much shorter than intended after it dries. However, wet cutting works for experienced cutters who understand their hair’s shrinkage pattern and want to work with more manageable, stretched curls. If you choose wet cutting, work with damp rather than soaking wet hair.
What type of scissors should I use for cutting curly hair?
Professional haircutting shears with sharp, beveled blades are essential for cutting curly hair properly. Look for scissors between six and seven inches long made from stainless steel or Japanese steel. Avoid kitchen scissors, craft scissors, or any household cutting tools, as these crush hair instead of slicing cleanly through it. Quality haircutting scissors cost between thirty and one hundred dollars but last for years and deliver dramatically better results than cheap alternatives.
How can I avoid making my curly hair look uneven after cutting?
Systematic sectioning and cutting small amounts at a time are your best defenses against uneven results. Divide your hair into four main quadrants and work through each methodically from bottom to top. Cut conservatively, removing only one-quarter to one-half inch initially, then reassess before cutting more. Use a handheld mirror to check the back of your head frequently during cutting. Remember that curly hair naturally has some variation in length due to different curl patterns, so perfect uniformity is less important than overall balanced shape.
Can I create layers in my long curly hair myself?
Yes, you can create layers at home using the elevation method, where you hold sections straight up from your scalp and cut the ends while maintaining that angle. Start with the top sections for crown volume, then work through the sides using slightly lower angles. However, aggressive layering throughout requires significant skill to execute well. For your first attempts, create subtle layers only in the top sections while maintaining more uniform length throughout the rest of your hair. This conservative approach adds movement without risking choppy, overly layered results that are difficult to fix.
You May Also Like This Post: Number 4 Buzz Cut Explained: Is It Right for You?